

In today’s fast-paced digital landscape, the ability to rapidly prototype and deploy custom internal tools is a significant competitive advantage. However, traditional development cycles can be lengthy and resource-intensive. What if you could go from an idea to a fully functional, production-ready web application in a matter of hours, not months? This guide will walk you through exactly that process.
We will demonstrate how to build a complete Internal IT Helpdesk System using a powerful trio of tools: Visual Paradigm App Studio for AI-powered app blueprint generation, Google AI Studio for application creation, and Vercel for seamless deployment. This approach showcases a modern, data-driven development workflow that prioritizes speed, efficiency, and a solid architectural foundation.

By the end of this tutorial, you will have a clear understanding of how to leverage AI to build robust, scalable applications, manage your database, and deploy your app to the cloud, all without writing a single line of code manually.
Part 1: Kick-Starting Your Project in Visual Paradigm App Studio
Visual Paradigm App Studio is an innovative, AI-powered prompt engineering workspace. Unlike conventional app builders, it adopts a data-driven approach. It helps you design a production-ready database schema and then generates a comprehensive AI prompt that contains all the backend logic, database connection details, and frontend specifications needed to build your app in a platform like Google AI Studio.
- Access App Studio: Begin by navigating to the Visual Paradigm App Studio at https://ai-toolbox.visual-paradigm.com/app/app-studio/.
- Login and License Verification: Ensure you are logged into your Visual Paradigm account. To do this, click on the avatar icon in the top right corner and select “Login.” A valid license for either Visual Paradigm Online Combo Edition or Visual Paradigm Desktop Professional Edition (or higher) is required to access App Studio.
- Define Your Application Requirements: The first step is to describe the application you want to build. In this example, we will create an Internal IT Helpdesk System. Enter the following detailed description into the input box on the App Studio index page:
“I need an Internal IT Helpdesk System. Employees should be able to log in and submit a ticket with a title, description, priority level, and an assignee. There should be a dashboard to view all active tickets, allowing employees to browse and update ticket details, including adding comments.”
Pro Tip: If you are unsure how to write a comprehensive description, you can write a brief one and use the “Enhance Prompt” button to let the AI enrich it for you.
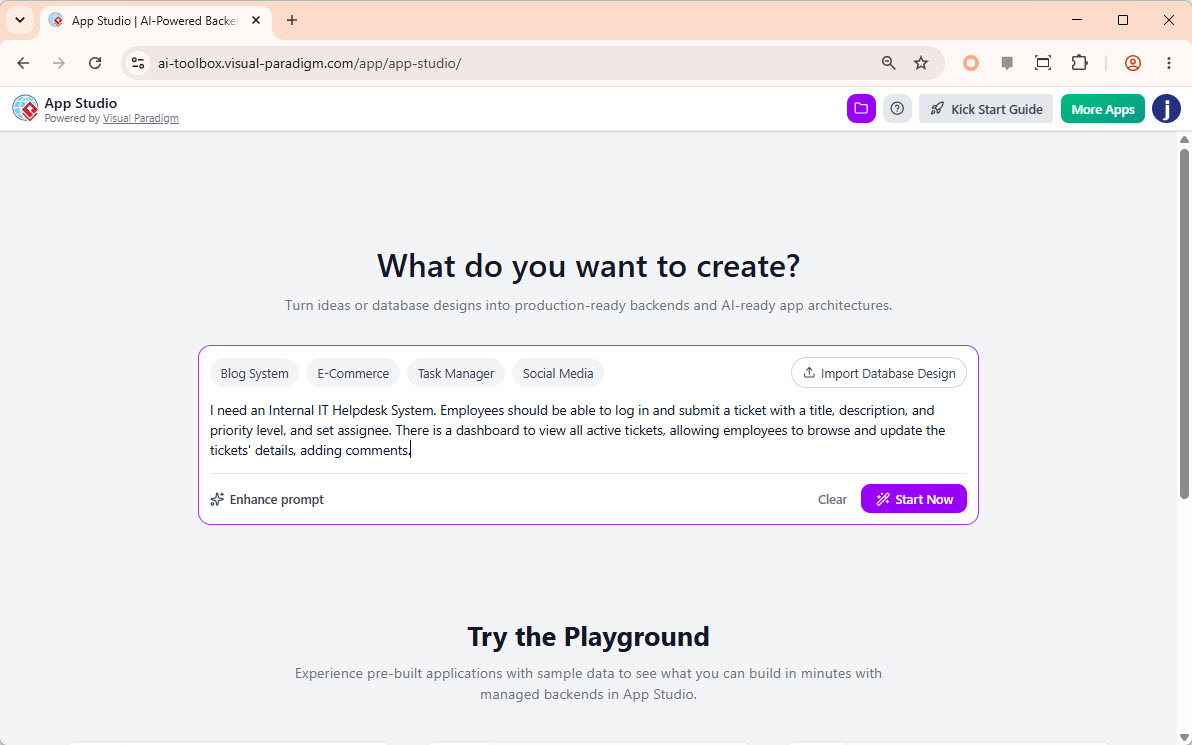
- Initiate the Process: After entering your description, click the “Start Now” button. (Alternatively, you can start by importing a database design using PlantUML if you already have a pre-planned data model. This is ideal for more complex projects or when you want to ensure a specific data structure from the outset.)
- AI-Driven ERD Generation: Once you click “Start Now,” the AI will analyze your requirements and generate an initial Entity-Relationship Diagram (ERD). Initially, the diagram will show the entities without their columns. Wait a few moments while the AI processes and generates the full structure.
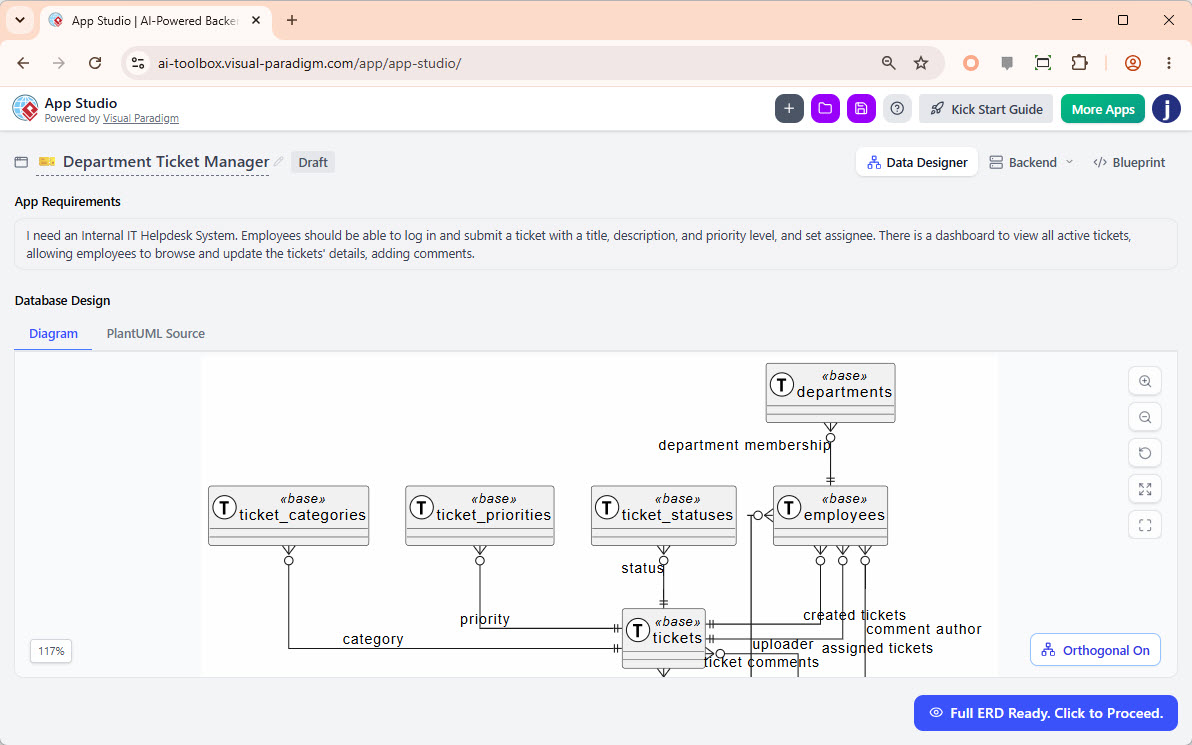
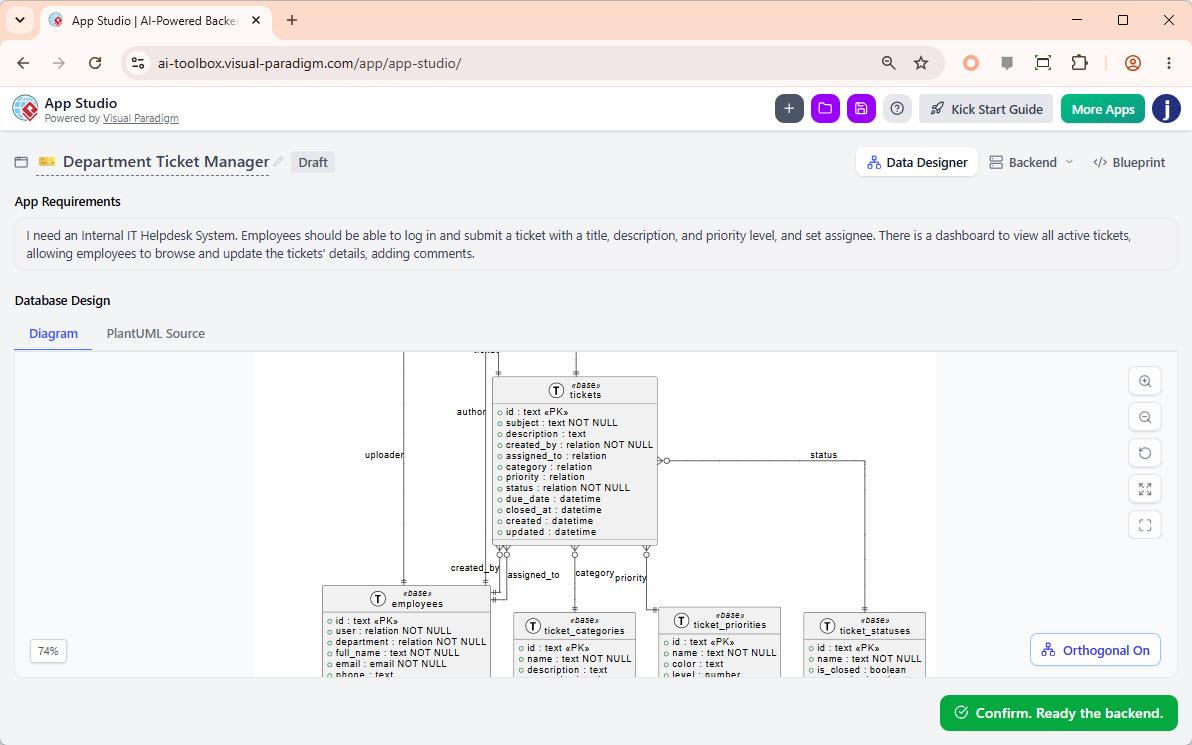
- Review and Confirm the Data Model: When the AI has finished, a button labeled “Full ERD Ready. Click to Proceed” will appear in the bottom right corner. Click this button to view the complete ERD with all tables and columns populated. Carefully review the diagram to ensure the data model accurately reflects your application’s needs. If everything looks correct, click “Confirm, Ready the backend.”
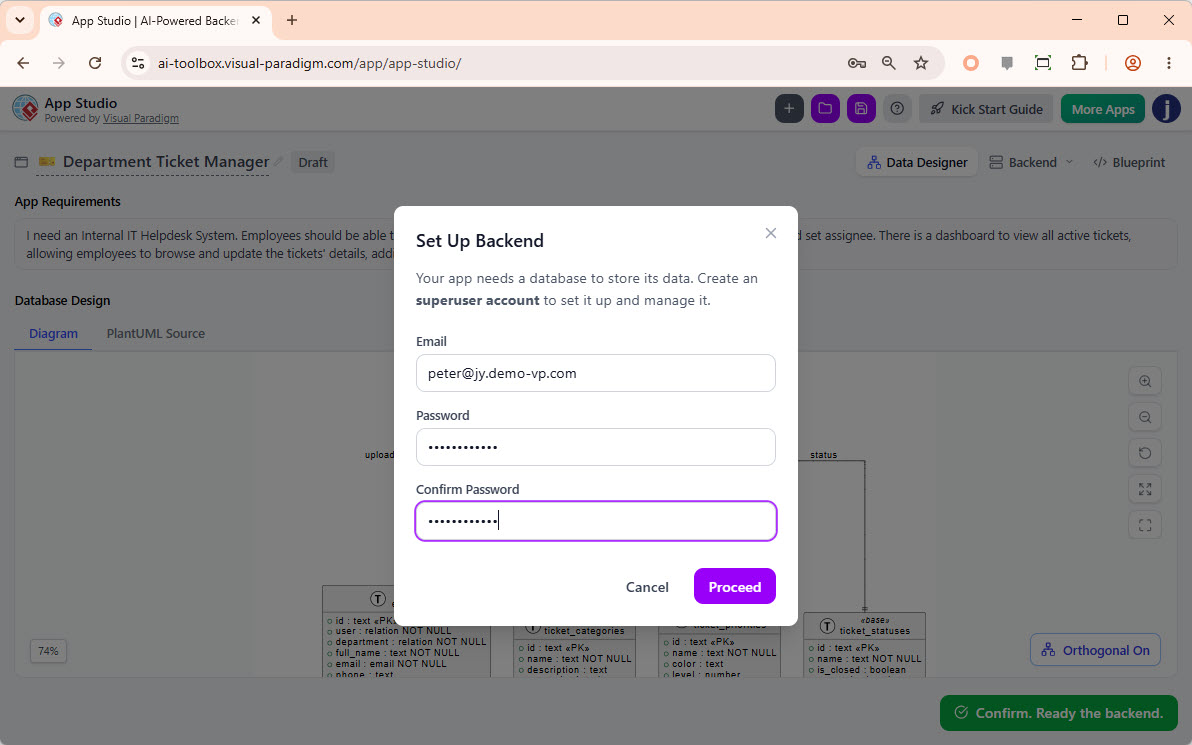
- Set Up the Database Backend: A dialog box titled “Set Up Backend” will appear. Your application requires a database to store its data. App Studio will provision a managed database for you. Enter your preferred email address and password to create a superuser account for your app’s database. Click “Proceed” to continue.
- Database Provisioning and Data Seeding: App Studio will take a few seconds to set up your database. Once complete, the AI will automatically generate and insert some sample records into your database tables. This feature is invaluable for testing and exploring your application’s functionality with pre-existing data. You can always delete, modify, or add to this data later using the built-in database management tools.
- Customize Your Application Blueprint: You will now be brought to the “Blueprint” page.
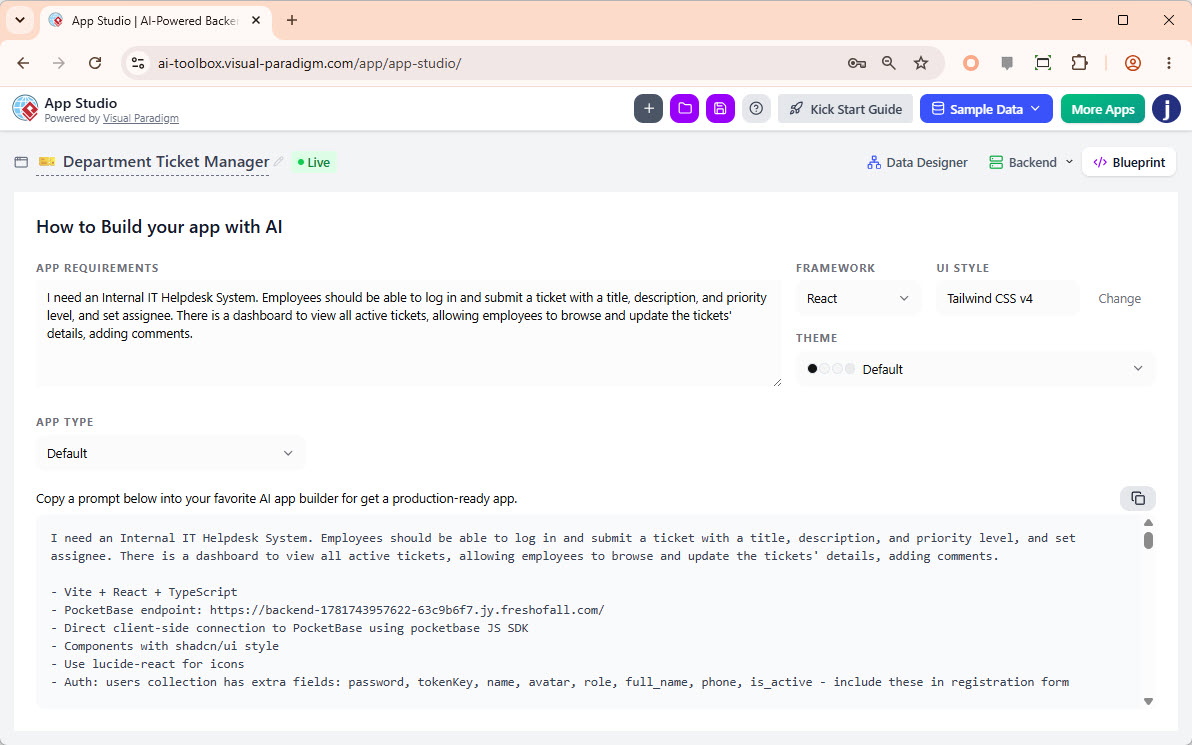
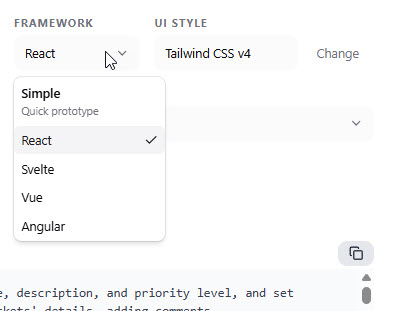
This is where you can fine-tune the parameters that will influence the final AI prompt. Before copying the prompt, configure the following options:- Framework: Select your preferred frontend framework. Options include Simple, React (Default), Svelte, Vue, and Angular. For this guide, we will keep the default React.
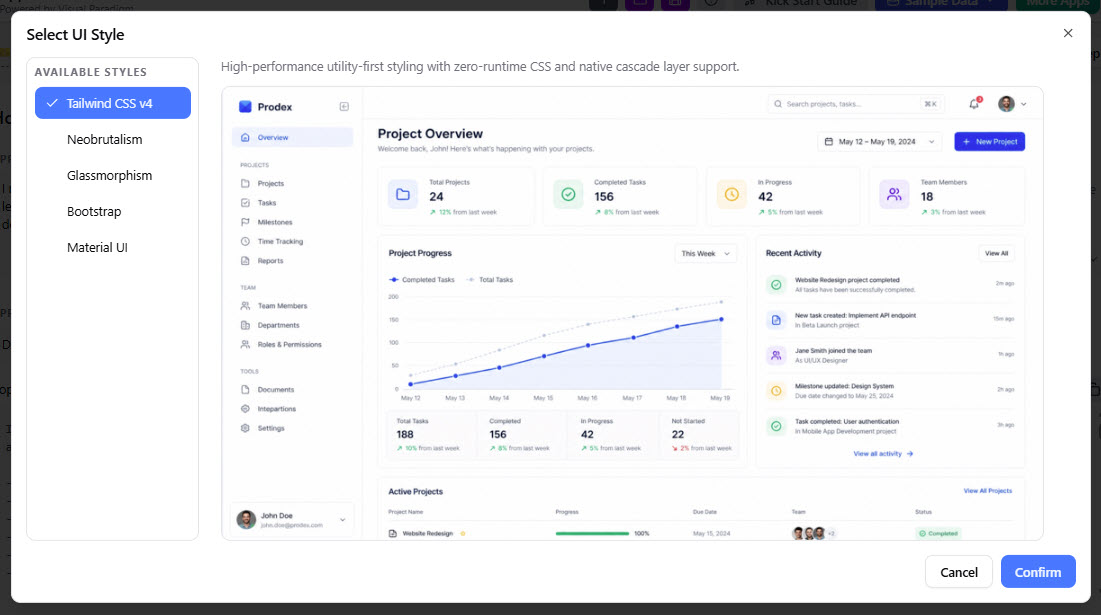
- UI Style: Click on the “UI Style” field to open a preview dialog and select from various styles like Tailwind CSS v4 (Default), Neobrutalism, Glassmorphism, Bootstrap, or Material UI. We will stick with Tailwind CSS v4.
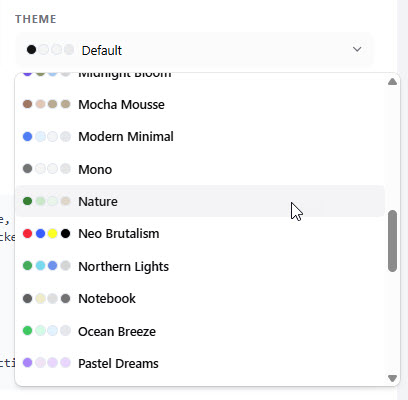
- Theme: Choose a color palette for your application. We will select the “Nature” palette for a clean, professional look.
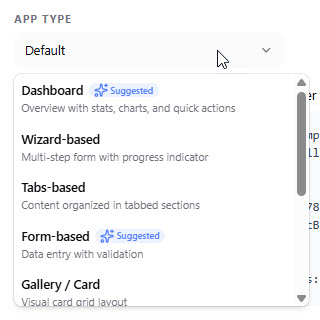
- App Type: Select a layout type to better control the app’s behavior and user interface. Options include Default, Wizard-based, Tabs-based, Form-based, Gallery/Card, List/Table, List with Details, Calendar, and Kanban. If you are unsure, leave the default “Default” selected.
- Framework: Select your preferred frontend framework. Options include Simple, React (Default), Svelte, Vue, and Angular. For this guide, we will keep the default React.
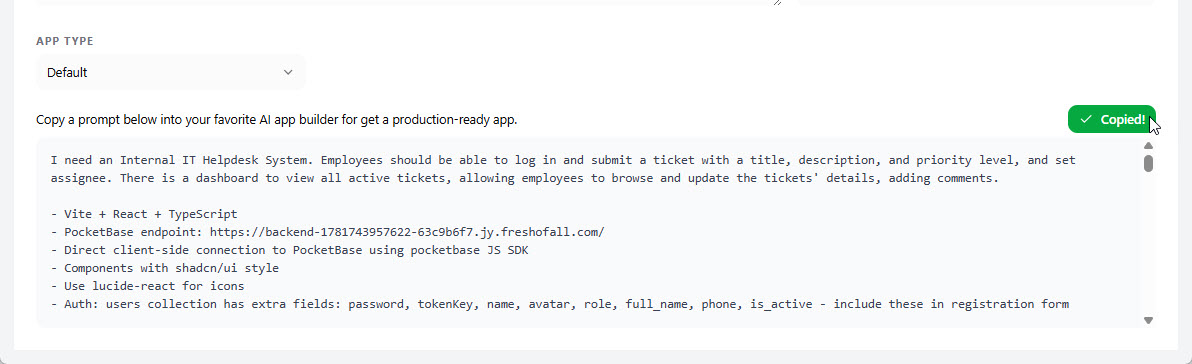
- Copy the Production-Ready AI Prompt: Once all parameters are set, click the “Copy” button. This copies a comprehensive AI prompt to your clipboard. This prompt encapsulates your application requirements, the selected parameters, the complete data schema, database configuration, and business logic. You are now ready to use this prompt in your chosen AI app-building platform.
Part 2: Generating and Refining Your App in Google AI Studio
With the AI prompt generated by App Studio, we will now use Google AI Studio to build the actual application. Google AI Studio is a powerful platform that translates natural language prompts into functional web applications.
- Start a New App Project: Open Google AI Studio and create a new app project. Paste the prompt you copied from App Studio directly into the prompt input area. We recommend making the prompt inline to provide full context to the AI, rather than attaching it as a file.

- Initiate App Building: Simply click the “Build” button to start the process. There is no need to edit or modify the prompt; it is already production-ready and contains all necessary instructions.
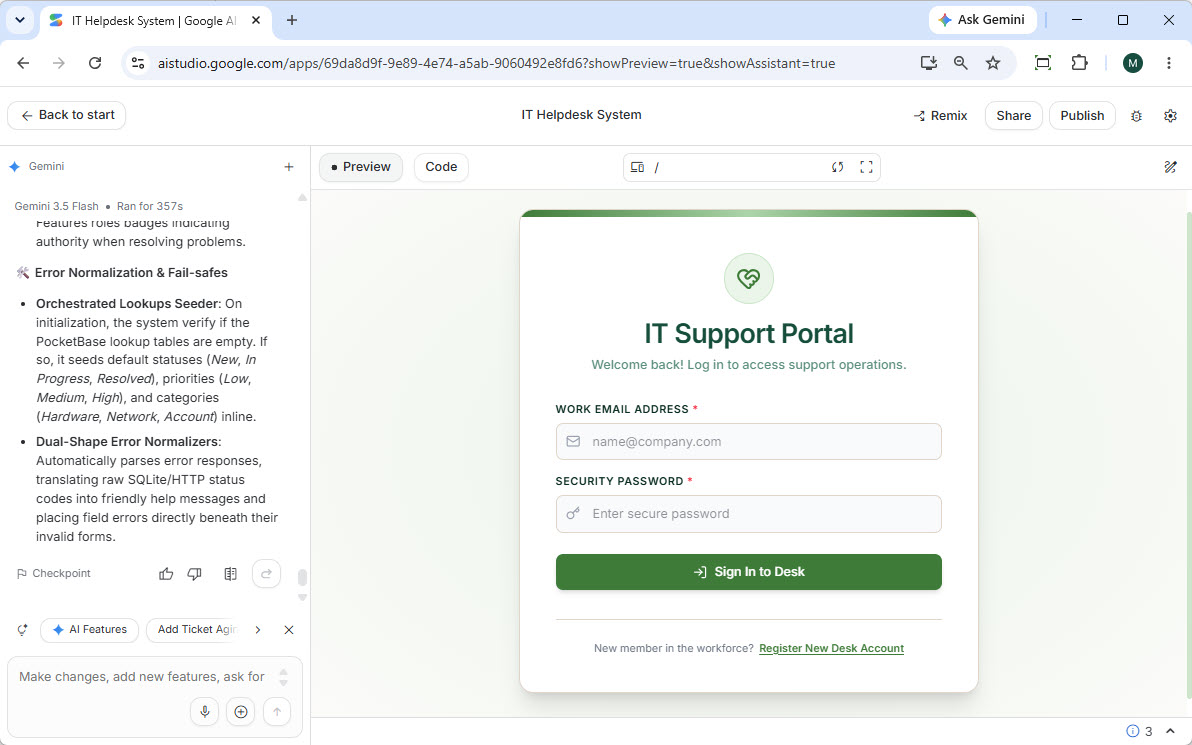
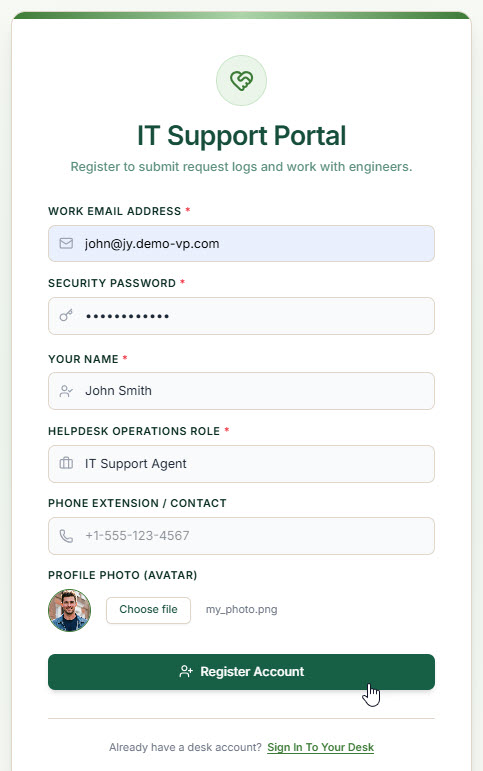
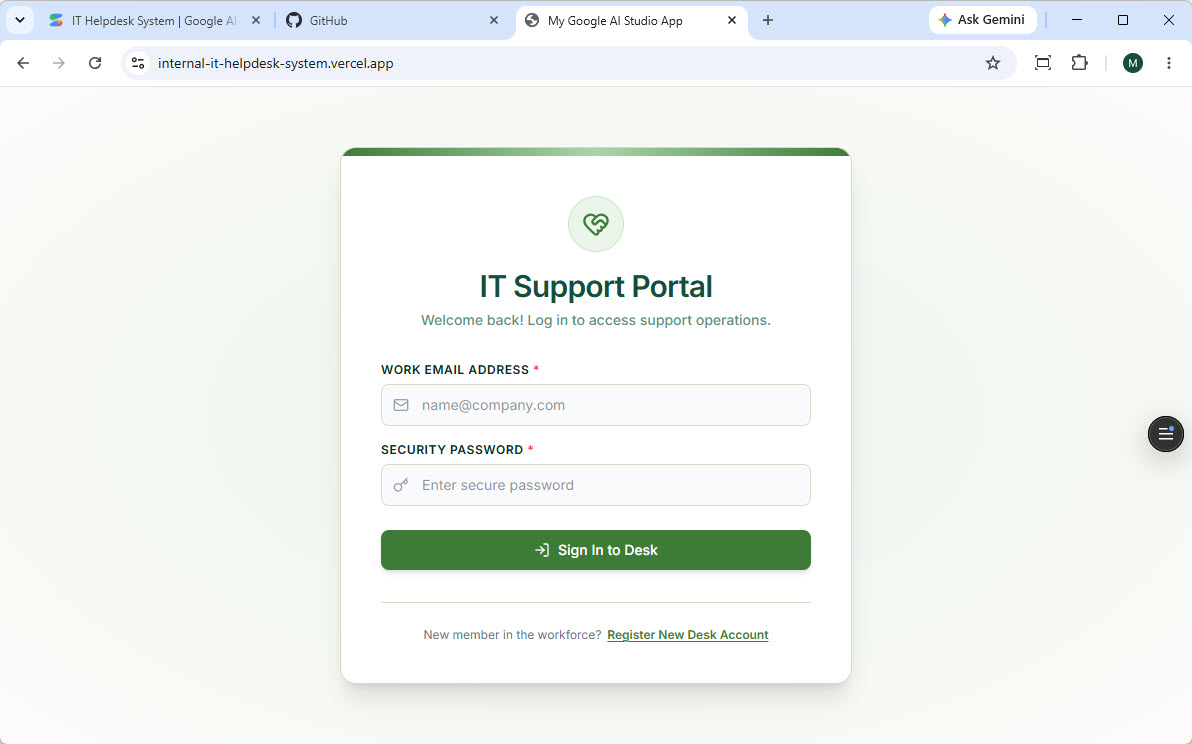
- App Generation: Google AI Studio will take a few moments to process and build your application. Upon completion, you will be presented with a fully functional, beautiful web application. In this case, we are building an Internal IT Helpdesk System, so you will first see the login screen.
- Testing the Application: Let’s test the core functionality:
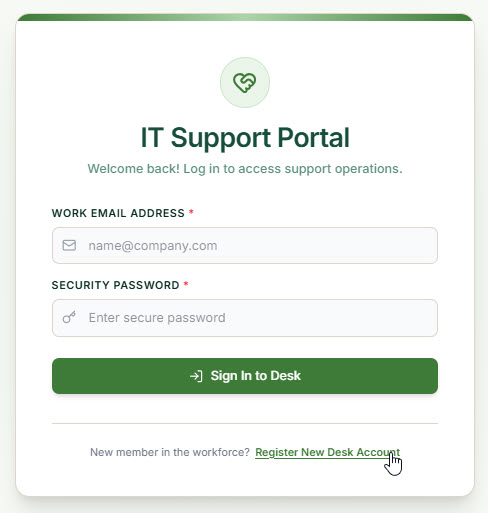
- Create a User: Click on “Register New Deck Account” located at the bottom of the login form.
- Enter User Information: Fill in the required information for the new user account and proceed.
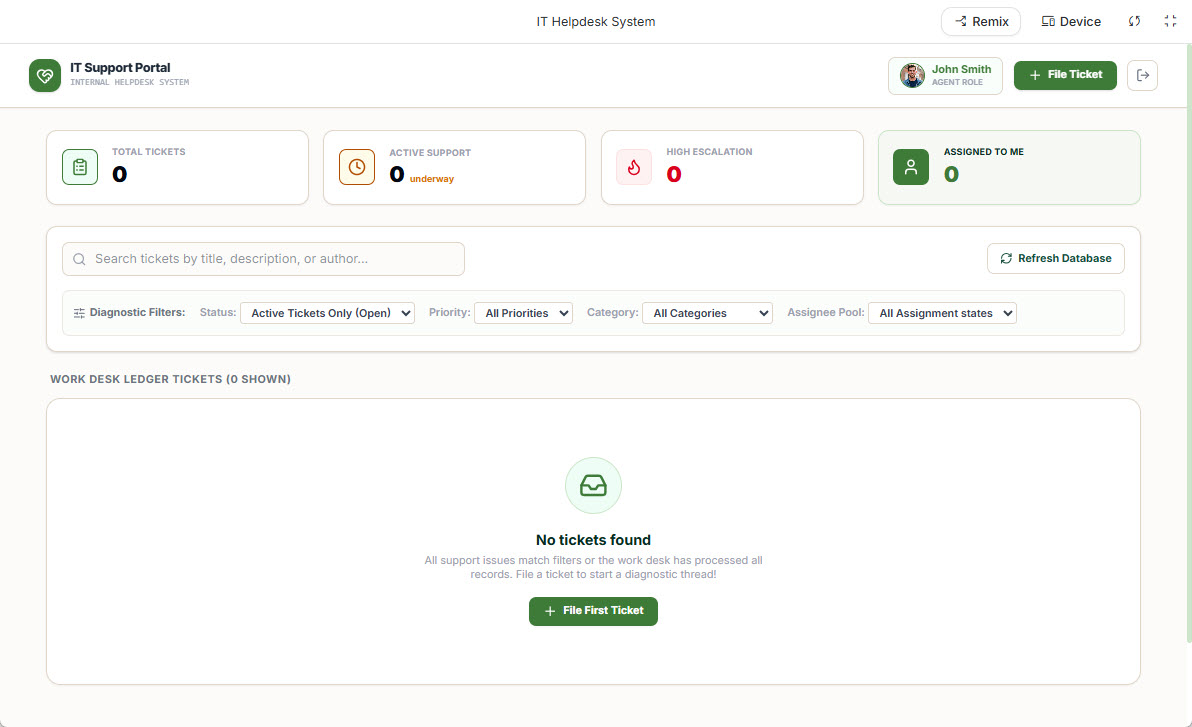
- Login and Dashboard: After successful registration, you will be logged in automatically and directed to a beautiful, functional dashboard.
- Create a New Ticket: Click on the “File Ticket” button, typically located at the top right of the interface. Fill in the ticket details, including the title, description, priority, and assignee. Notice the “Category” field, which is a lookup field pre-populated with sample data generated by App Studio. This sample data is useful for testing, but you will likely want to clear it before launching your app.
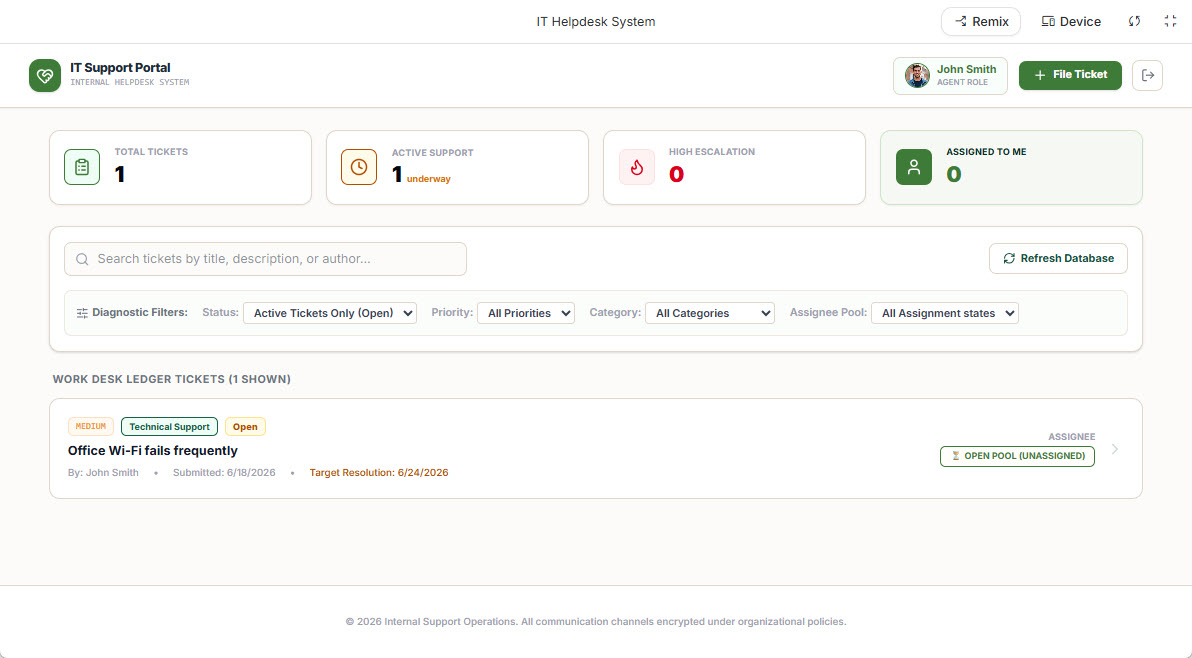
- Submit Ticket: Click “File Ticket & Submit.” The new ticket will be successfully created and will appear in your dashboard’s ticket list.
- Create a User: Click on “Register New Deck Account” located at the bottom of the login form.
Part 3: Managing Your Application’s Database
Before deploying your application to production, it is crucial to review and clean up the database. App Studio provides an intuitive database management interface for this purpose.
- Access Database Management: Return to the Visual Paradigm App Studio interface.
- Open the Backend Console: Click the “Backend” button located at the top right of the screen. This will lead you to the database management console.
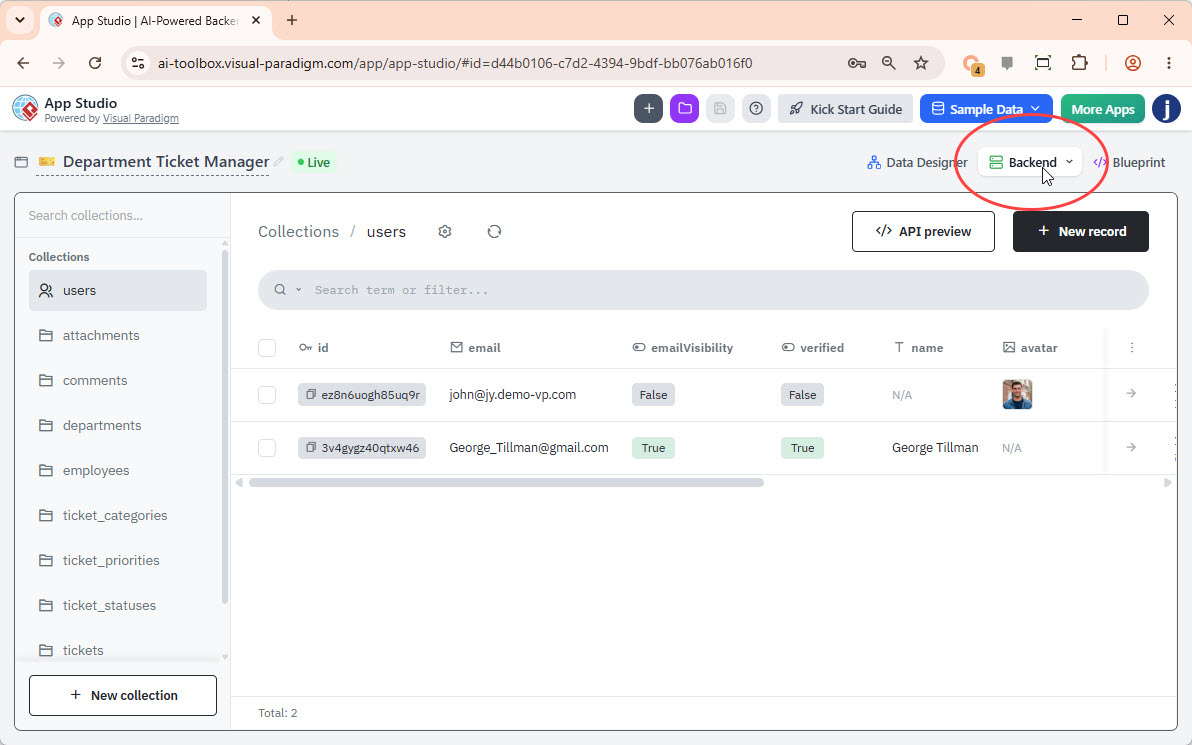
- Manage Records: The database management screen displays all your tables on the left. Clicking on any table shows its records on the right. You can:
- Select individual records for deletion.
- Click on “New record” to add new data.
- Edit existing records by clicking on the fields.
Any changes you make here will be instantly reflected in your live application, as it is directly connected to this managed database. This is the perfect time to remove or modify sample data and set up any necessary lookup tables (e.g., categories, priorities) with your production data.
Part 4: Deploying Your App to Production with Vercel
The final step is to deploy your application, making it accessible to your users. For this guide, we will use Vercel, a popular platform for hosting frontend applications. Deployment can be done in several ways; we will demonstrate the process using a Git repository (GitHub) integration.
4.1 Syncing from Google AI Studio to GitHub
- Return to Google AI Studio: Go back to your project in Google AI Studio.
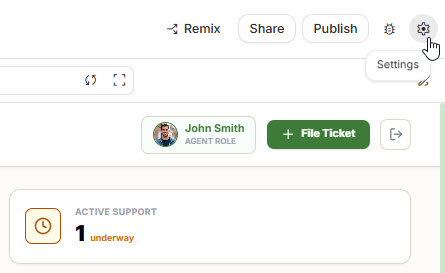
- Open Settings: Click on the Settings button (gear icon) located in the top right corner of the interface.
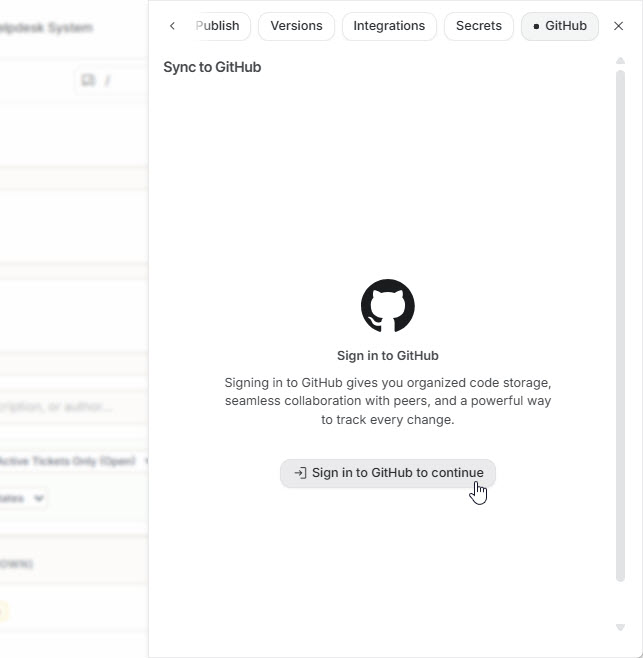
- Connect GitHub: Navigate to the “GitHub” tab and click “Sign in to GitHub” to authorize and install the Google AI Studio integration.
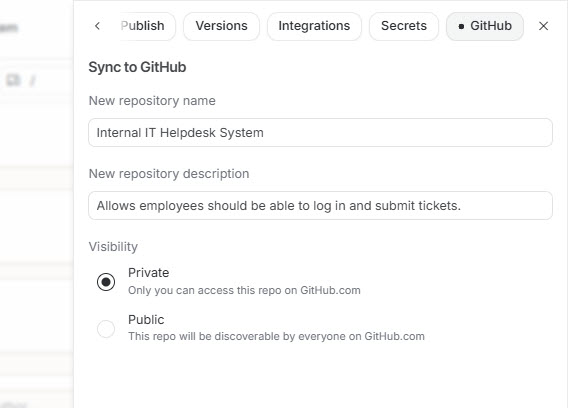
- Create a Repository: Enter a name and description for your repository, choose its visibility (public or private), and click “Create GitHub repository.”
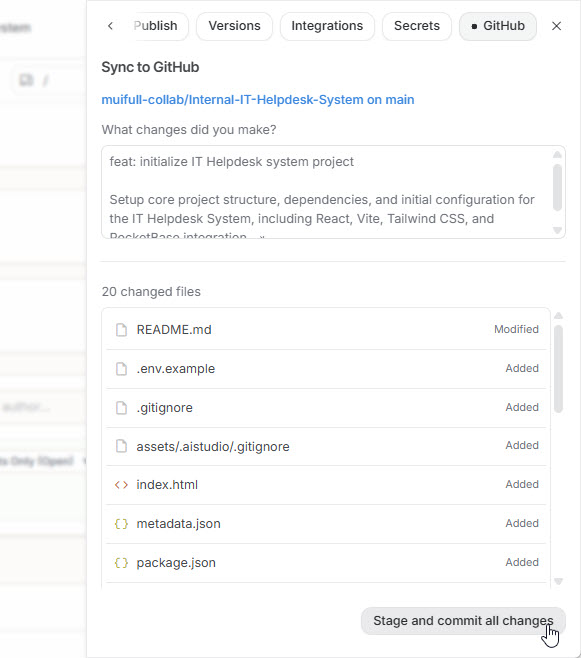
- Commit Changes: Google AI Studio will sync your project files to the new GitHub repository. Review the changes and click “Stage and commit all changes.” You will receive a confirmation when the synchronization is complete.
4.2 Deploying Your App to Vercel
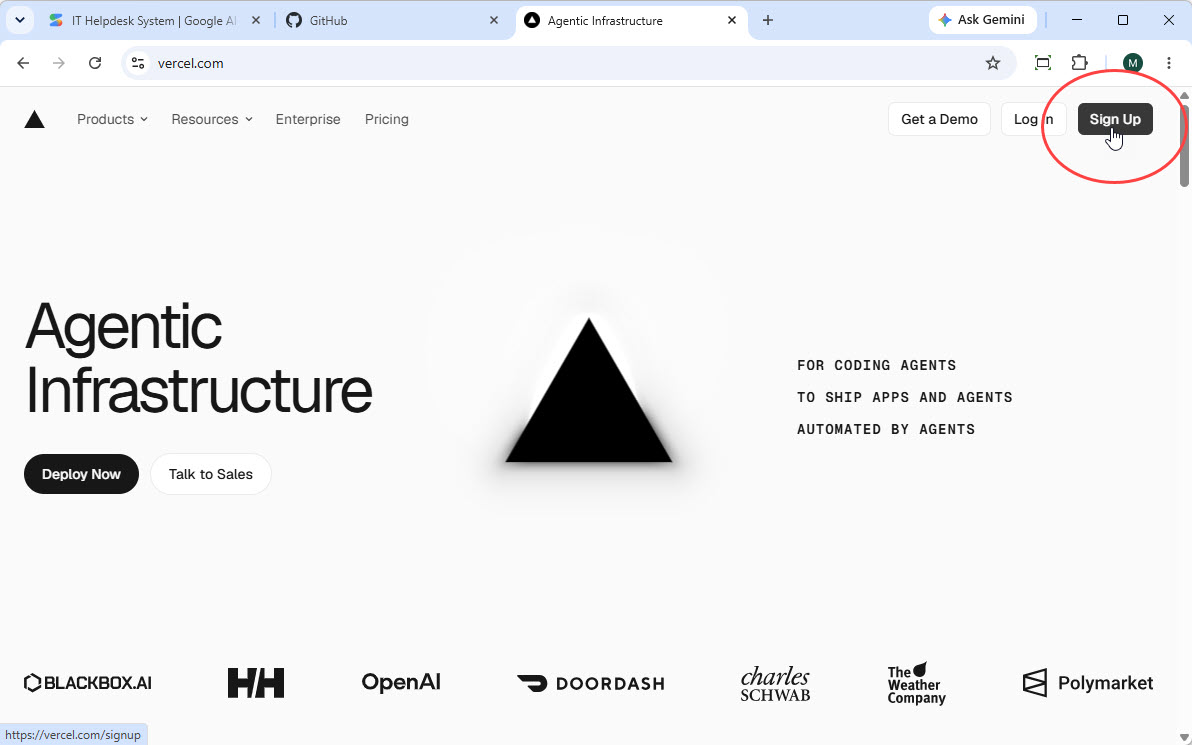
- Create a Vercel Account: If you don’t already have one, go to vercel.com and click “Sign up”. We recommend signing up with your GitHub account for seamless integration.
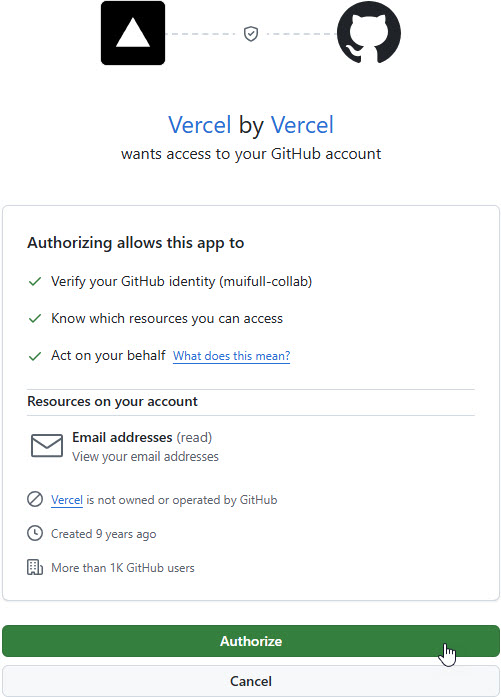
- Authorize Vercel: Allow Vercel to access your GitHub account when prompted.
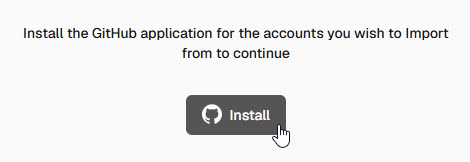
- Import Your Git Repository: On your Vercel dashboard, select the option to import a Git repository. Click “Install” to install the Vercel GitHub application for your account.
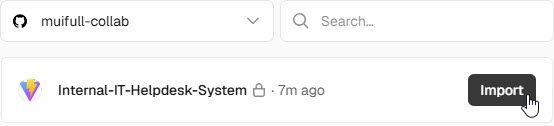
- Select Your Repository: Your GitHub repository will be listed. Click “Import” on the repository you just created.
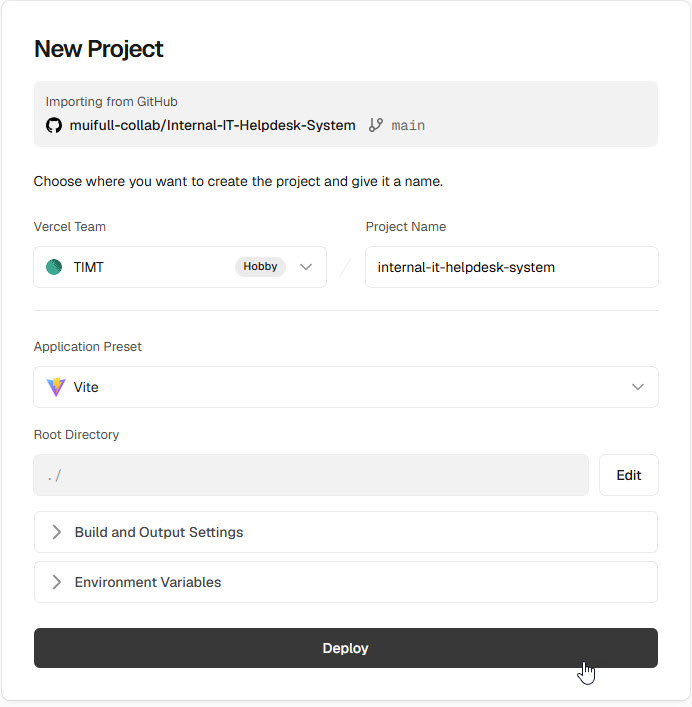
- Configure and Deploy: Vercel will automatically detect the project settings. Click “Deploy.”
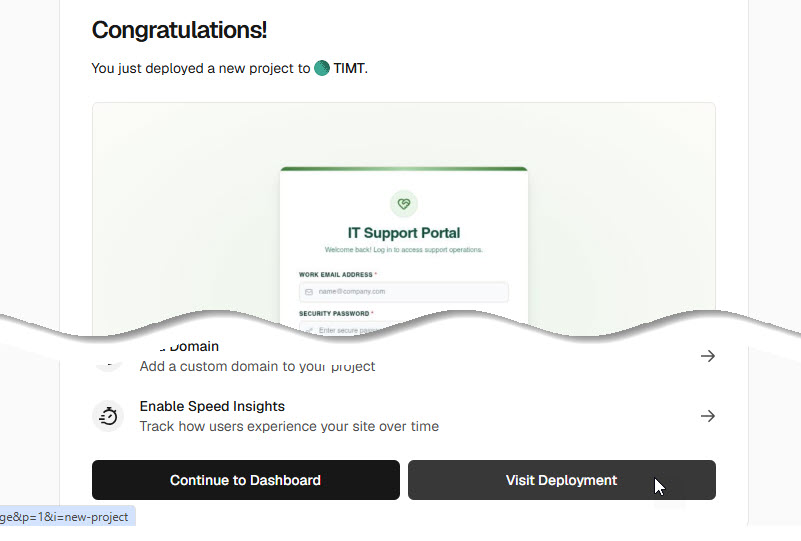
- Deployment Complete: Vercel will build and deploy your application. Once the process is complete, click “Visit Deployment” to view your live, production-ready Internal IT Helpdesk System.
Congratulations! You have successfully built and deployed a fully functional, production-ready application using Visual Paradigm App Studio, Google AI Studio, and Vercel. This workflow demonstrates the power and efficiency of AI-driven development, significantly accelerating the time-to-market for custom internal tools and business applications.
Key Benefits of Using This Data-Driven AI Approach
- Data-Driven Development: By starting with the data model, you ensure your application is built on a solid, scalable foundation. This approach reduces technical debt and improves long-term maintainability.
- Production-Ready Database Management: App Studio automatically provisions and manages a real database for you, complete with a superuser account, eliminating the complexity of manual database setup and configuration.
- Accelerated Time-to-Market: The combination of AI prompt generation and app building drastically reduces development time, allowing you to go from idea to deployment in hours, not weeks or months.
- Hassle-Free Backend Integration: The generated prompt includes all database connection details and business logic, so you don’t need to worry about API setup or backend connectivity when building your app in platforms like Google AI Studio.
- Customizable Frontend: The flexible prompt builder allows you to tailor the UI/UX of your application by selecting frameworks, UI styles, themes, and app types to match your branding and user needs.
- All-in-One Platform: App Studio serves as a single source of truth for your database design, database administration, and application prompt generation, streamlining the entire development process.
This tutorial has equipped you with the knowledge to build and deploy your own AI-powered applications. Experiment with different app types, UI styles, and database designs to unlock the full potential of this modern development workflow. The future of rapid application development is here, and it’s data-driven.