

Building a custom web application from scratch used to require weeks of database engineering, API plumbing, and frontend coding. Thanks to artificial intelligence, developers can now generate entire apps in seconds. However, most AI-powered app builders suffer from a fatal flaw: they lack a persistent, production-ready backend, forcing users to manually configure databases, manage servers, and wrestle with API endpoints.
Visual Paradigm App Studio solves this exact bottleneck. By adopting an innovative, data-driven approach, App Studio acts as the intelligent data architecture brain for your development process. It maps out your application schema via Entity-Relationship Diagrams (ERDs) and instantly provisions a live, managed cloud database. It then compiles these complex backend configurations into a single, comprehensive AI prompt optimized for platforms like Google AI Studio, v0, or Bolt.new to generate a fully connected frontend instantly.
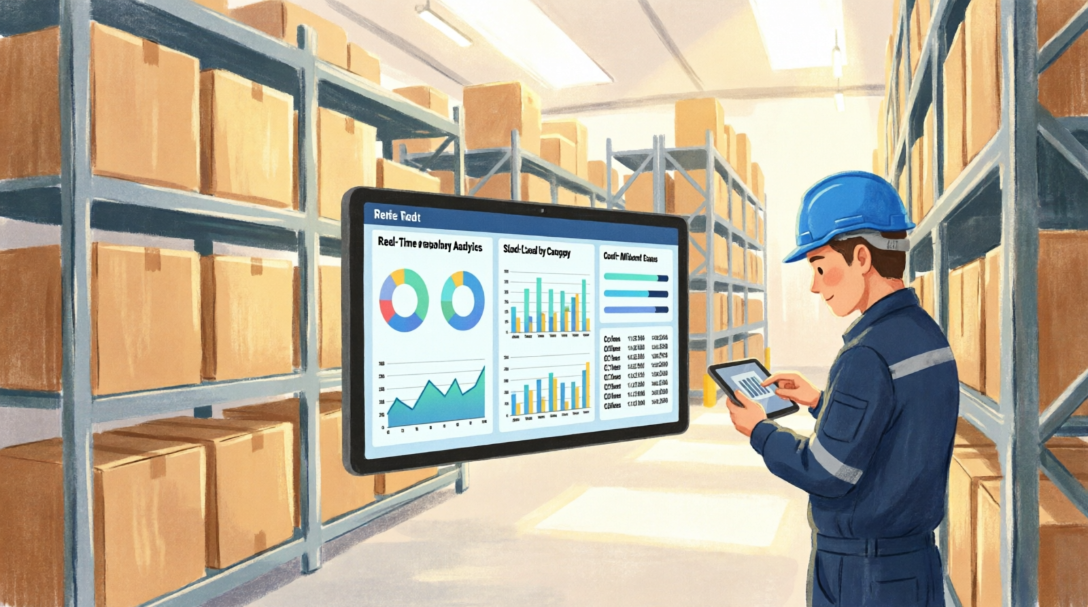
In this comprehensive, step-by-step tutorial, we will show you how to design, generate, and deploy a production-ready AI-powered Warehouse Management System using Visual Paradigm App Studio, Google AI Studio, and Netlify.
Part 1: Kick-Start Your Data Model in Visual Paradigm App Studio
Before generating user interfaces, a robust application requires a solid data architecture. Visual Paradigm App Studio ensures your app is built on a reliable data foundation from day one.
- Access the Platform
Navigate to the official portal: Visual Paradigm App Studio. - Verify Your License & Log In
To access the advanced AI prompt engineering capabilities, ensure you are logged into your Visual Paradigm account. Click on the avatar icon at the top right corner of the interface and select Login. App Studio is fully available for users with the following active licenses:- Visual Paradigm Online Combo Edition (or higher)
- Visual Paradigm Desktop Professional Edition (or higher)
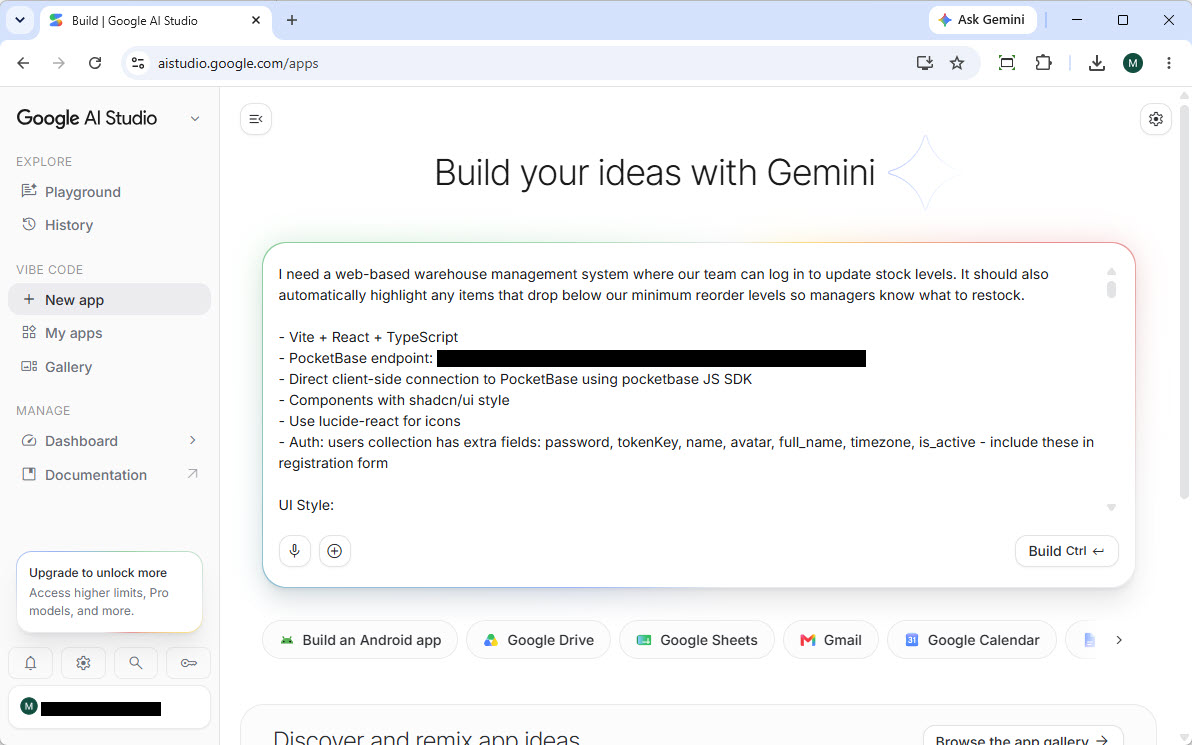
- Define Your Application Requirements
Type your system requirements into the central text prompt box. For this demonstration, we are constructing a web-based warehouse system. Enter the following prompt: “I need a web-based warehouse management system where our team can log in to update stock levels. It should also automatically highlight any items that drop below our minimum reorder levels so managers know what to restock.”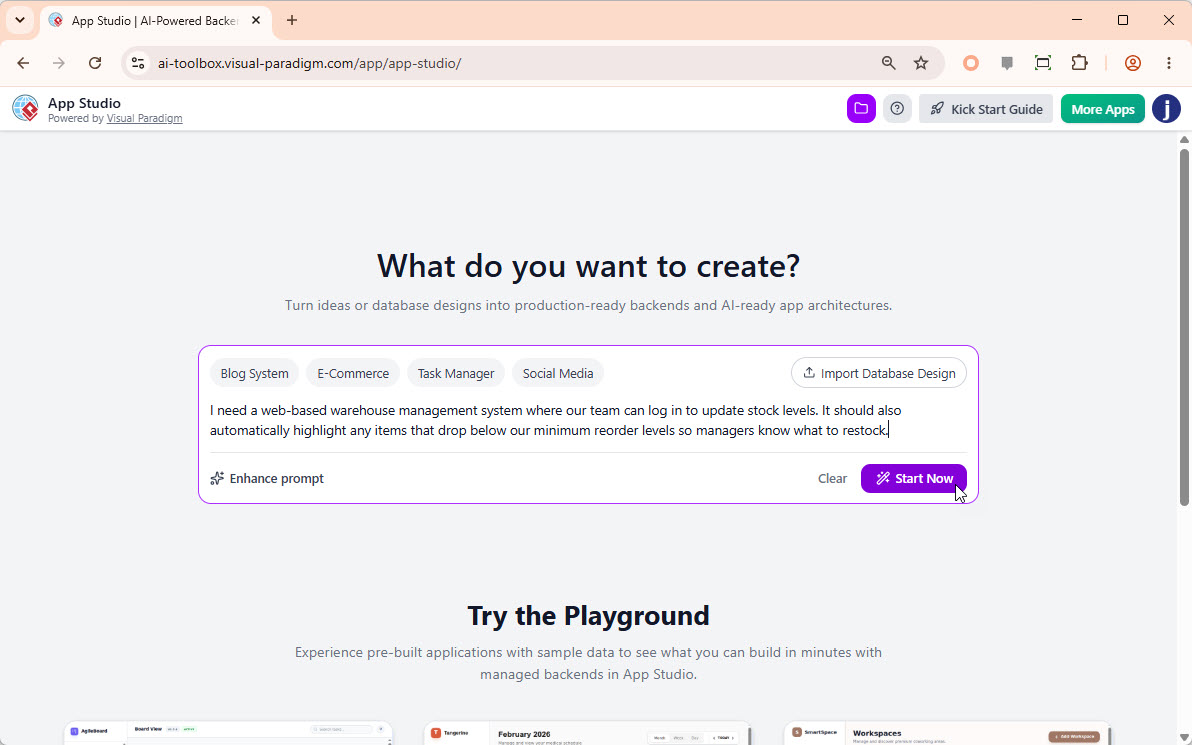 Pro Tip: If you only have a vague concept, click the “Enhance Prompt” button. The built-in AI will automatically enrich your text into a comprehensive, production-grade requirement document.
 - Choose Your Initialization Method
Click Start Now to advance. While this guide utilizes text descriptions, experienced database administrators can alternatively click Import Database Design to supply an existing PlantUML ERD code snippet. App Studio will automatically analyze and optimize the blueprint to guarantee it is free of syntax errors and ready for production deployment. - Review the Initial AI-Generated ERD
The system engine analyzes the requirements text and renders a conceptual high-level Entity-Relationship Diagram (ERD). At first, this diagram displays core entities without columns while the engine structures the background relations. Wait a few moments until the Full ERD Ready. Click to Proceed button illuminates at the bottom right corner.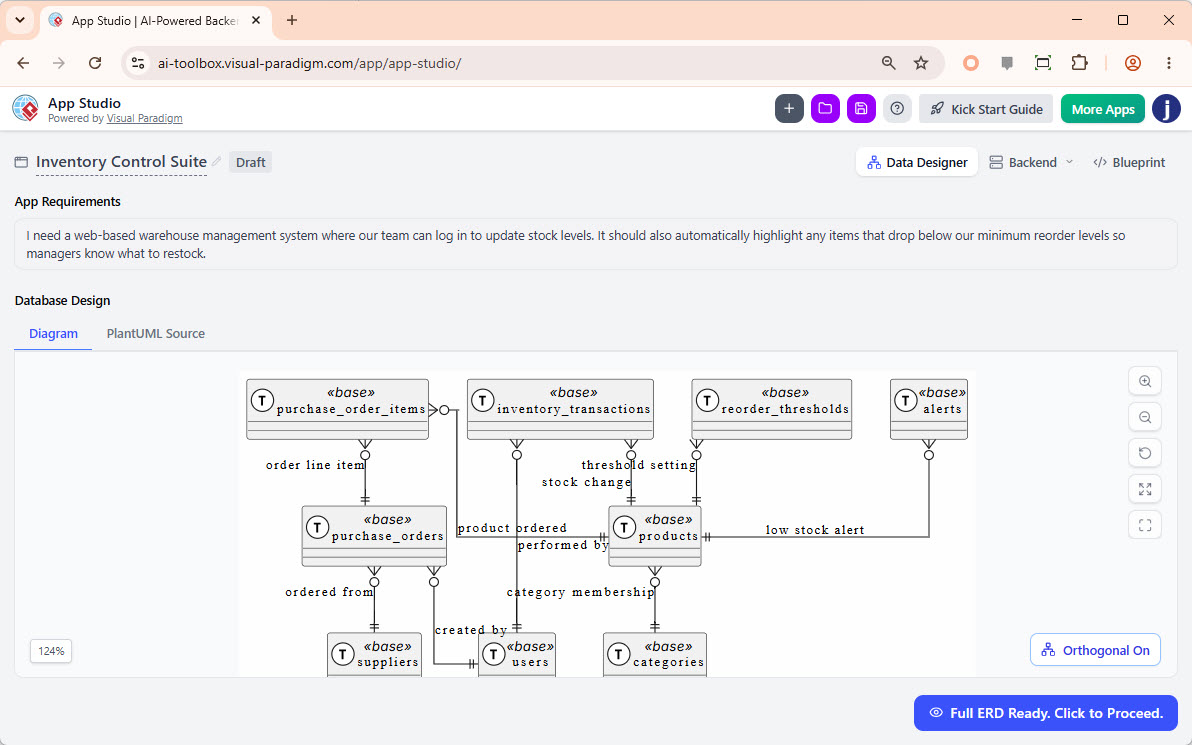
- Finalize Schema Tables and Columns
Click the Full ERD Ready. Click to Proceed button. App Studio expands the diagram to reveal the complete relational database design, populated with all necessary tables, primary/foreign keys, and data columns. Review the structure to ensure it matches your business requirements, then click Confirm. Ready the backend.
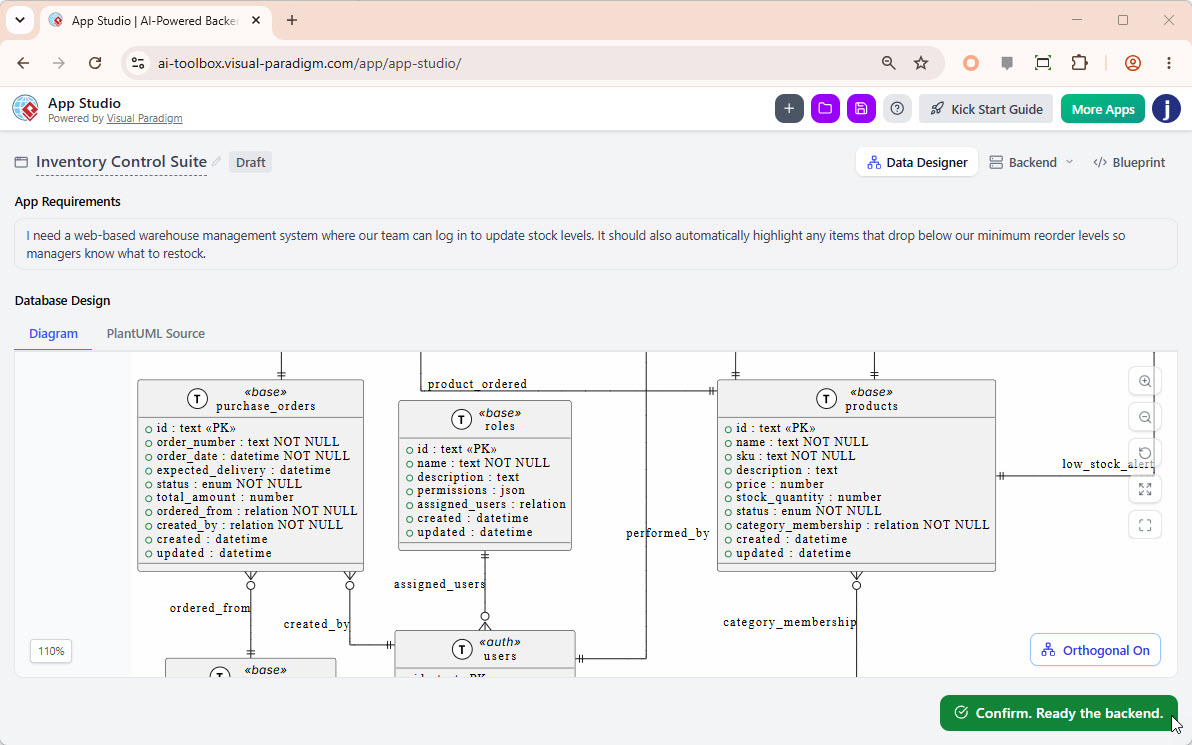
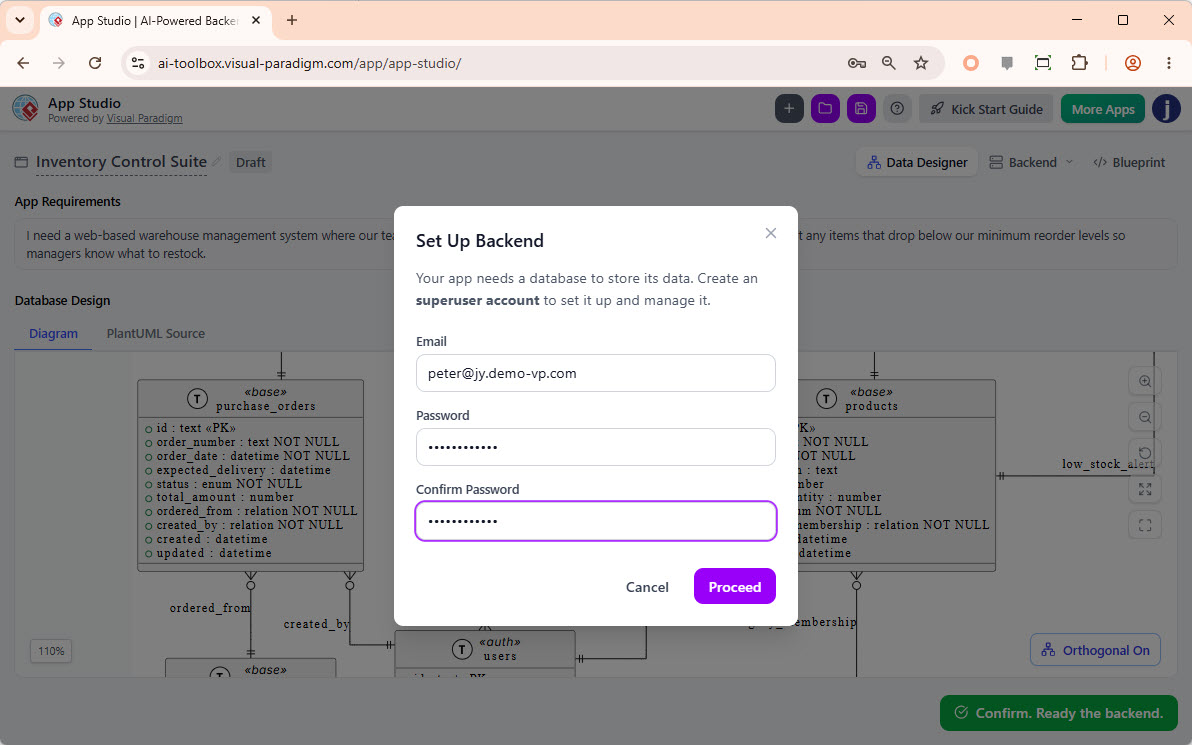
- Spin Up Your Managed Database Backend
Every functional application requires an isolated database. App Studio automatically handles cloud database provisioning. When the Set Up Backend dialog box appears, input your secure email address and password. This establishes your administrative superuser account for the database. Click Proceed.
- Automatic Database Provisioning and Mock Data Generation
The platform takes a few seconds to spin up your managed hosting environment. Once configured, the system automatically injects realistic mock data records into your database tables. This provides immediate data variables so you can test search filters, lookups, and forms the moment the app goes live. - Configure Tech Stack and UI Blueprint Parameters
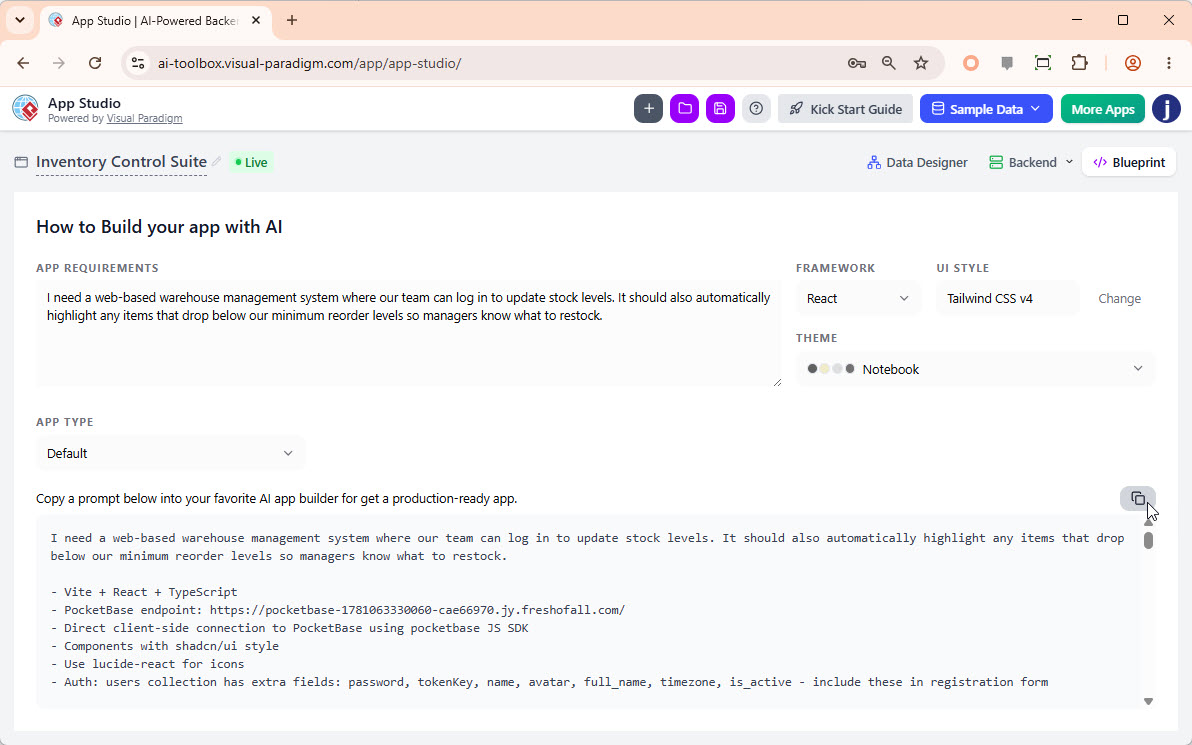
You will automatically land on the Blueprint dashboard. Before copying your master AI application prompt, fine-tune your frontend technical architecture using the customization selectors: choose your preferred JavaScript framework: React (Default), Simple HTML, Svelte, Vue, or Angular. For this warehouse example, retain React.

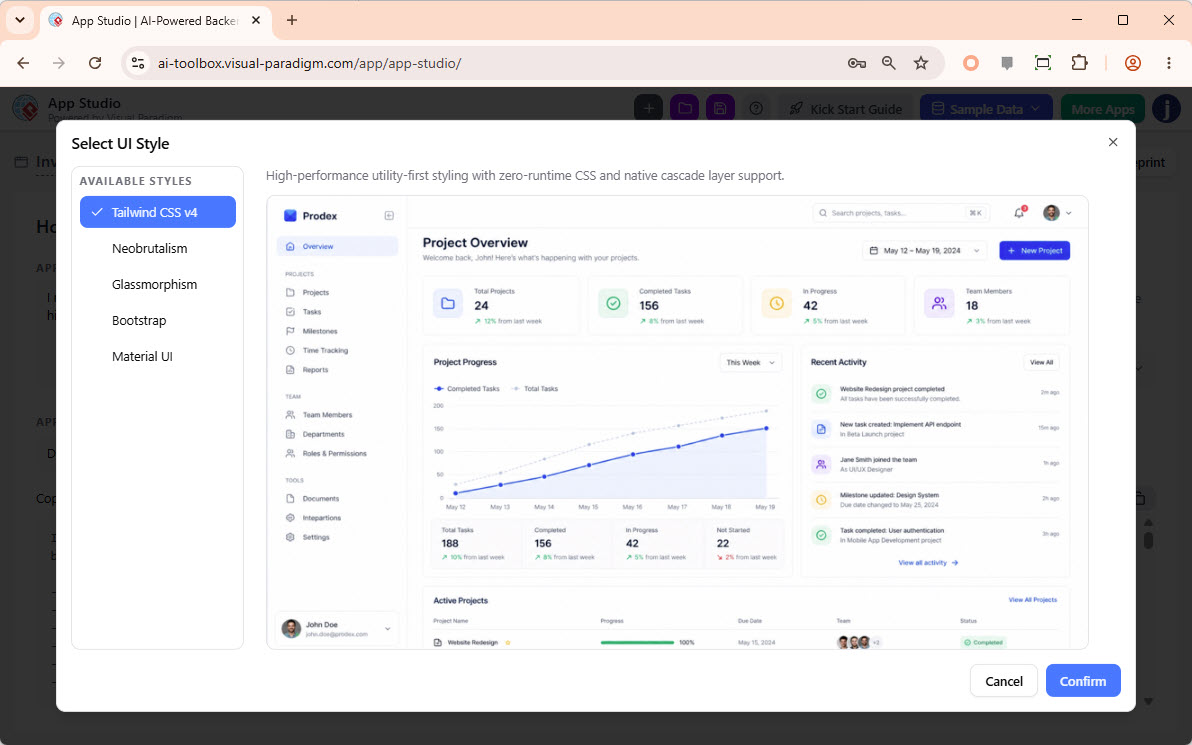
- Select a Component UI Design Style
Click the UI Style selection field to trigger a visual layout preview overlay. Select from modern framework options including Tailwind CSS v4 (Default), Neobrutalism, Glassmorphism, Bootstrap, or Material UI. For a clean business dashboard style, select Tailwind CSS v4.
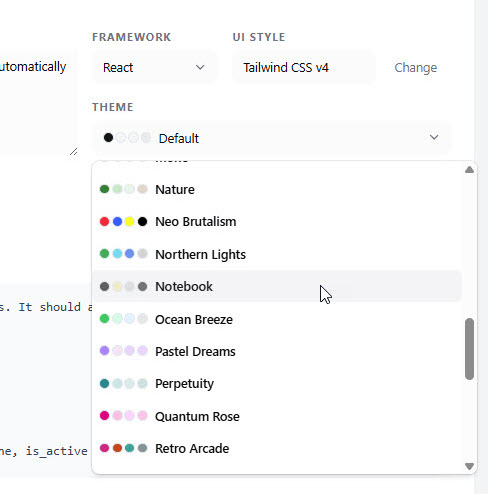
- Choose Your Branding Color Theme
Select an integrated color palette to skin your application interface. For this project, select the professional Notebook palette.
- Define Your App Type and Core Layout
Select an application layout architecture that matches your workflow requirements. Options include Dashboard, Wizard-based, Tabs-based, Form-based, Gallery/Card, List/Table, List with Details, Calendar, or Kanban. For a holistic warehouse overview, select Dashboard or leave it on Default to let the AI dynamically generate layouts based on data contexts.

- Copy Your Master AI Prompt
Click the Copy icon button. App Studio compiles your system requirements, UI design choices, color palettes, data schemas, live API connection variables, and validation business logic into one unified, optimized prompt string ready for deployment.
Part 2: Generate Your Web Application in Google AI Studio
With your complete data structure and API configurations embedded inside the generated prompt, you can easily build out your software frontend using code generation tools like Google AI Studio.
- Initialize the Code Project
Open your development console in Google AI Studio and start a new application project workspace. Paste the copied master prompt directly into the primary prompt instruction panel. It is recommended to keep the text block inline so the language model parses the instructions natively.
- Initialize Code Generation
Without altering any part of the compiled text string, click the Build or Generate button. The system interprets the data parameters, layouts, and backend schema connections mapped out by Visual Paradigm. - Preview the Generated System
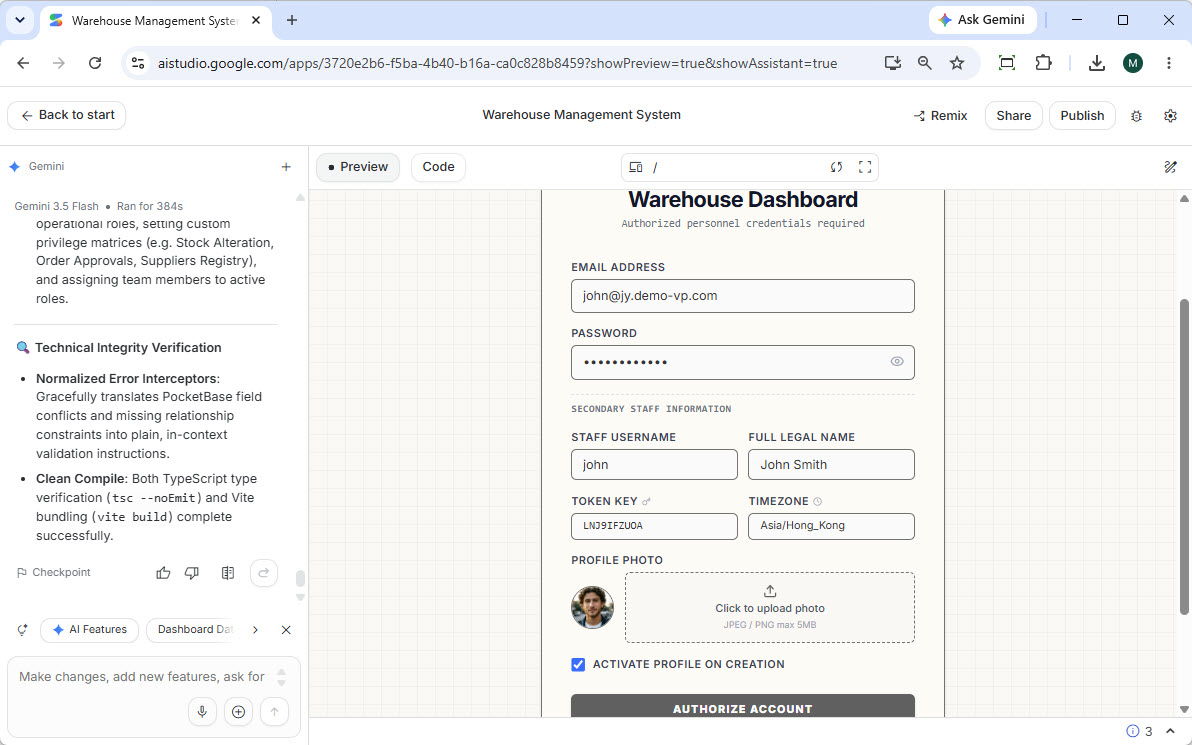
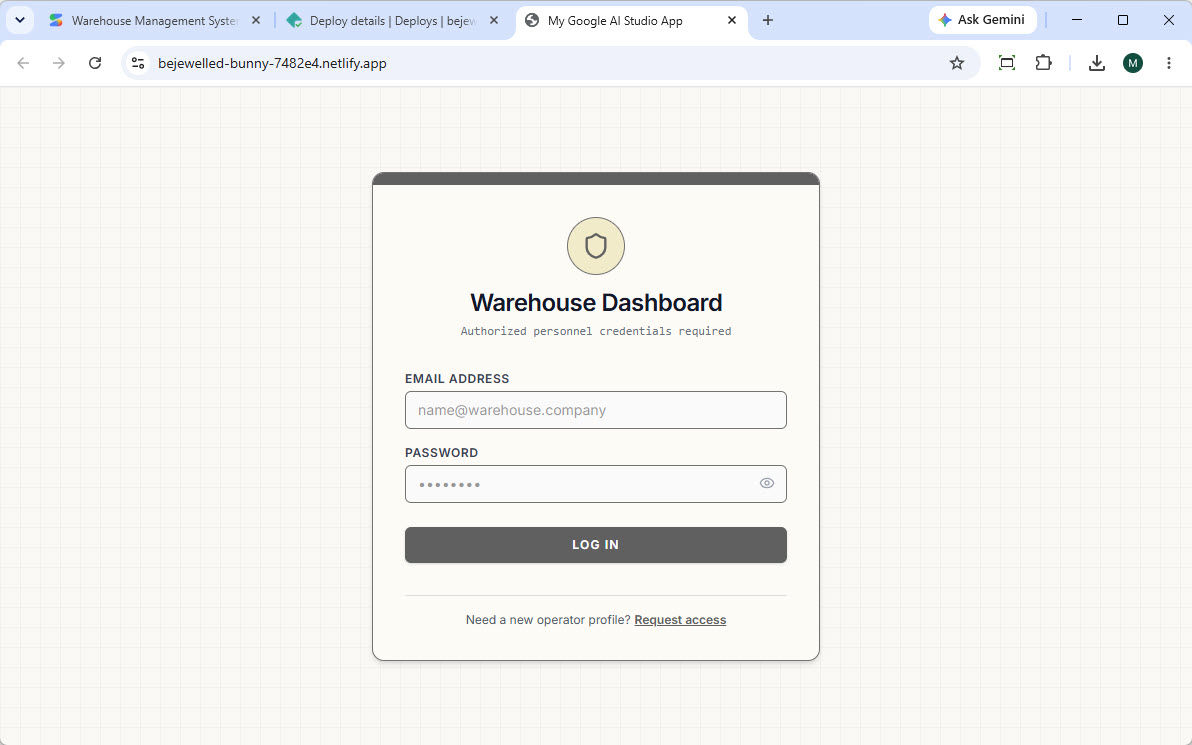
Once compilation completes, the staging environment will render the live preview of your warehouse application. You will be greeted by a secure User Login interface mapped to your managed database.

- Register a Test User
To test functionality, click the Request access link located at the bottom of the login form card. - Execute User Creation
Fill out the registration form text fields with your user credentials and submit the registration form. The frontend transmits a network call directly to your live database backend.
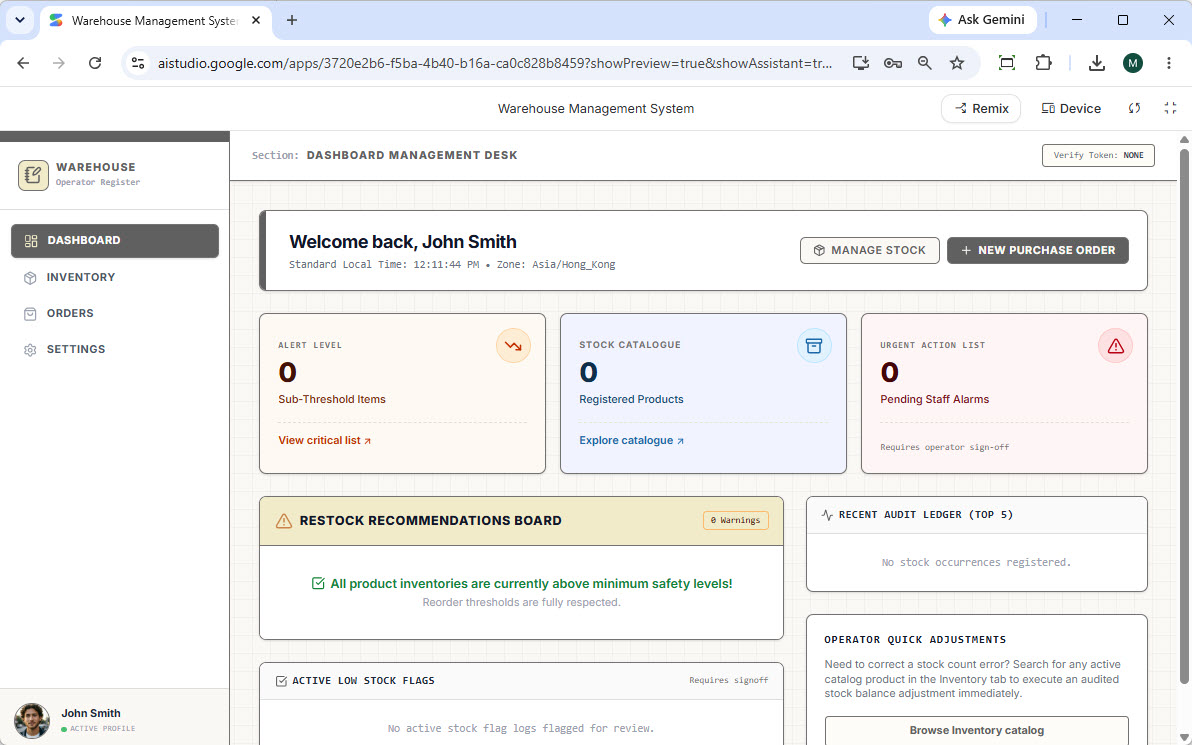
- Explore the Analytics Dashboard
Upon registration, the application redirects you to an interactive management dashboard complete with data metric cards, navigation menus, and real-time inventory tracking visualization widgets.
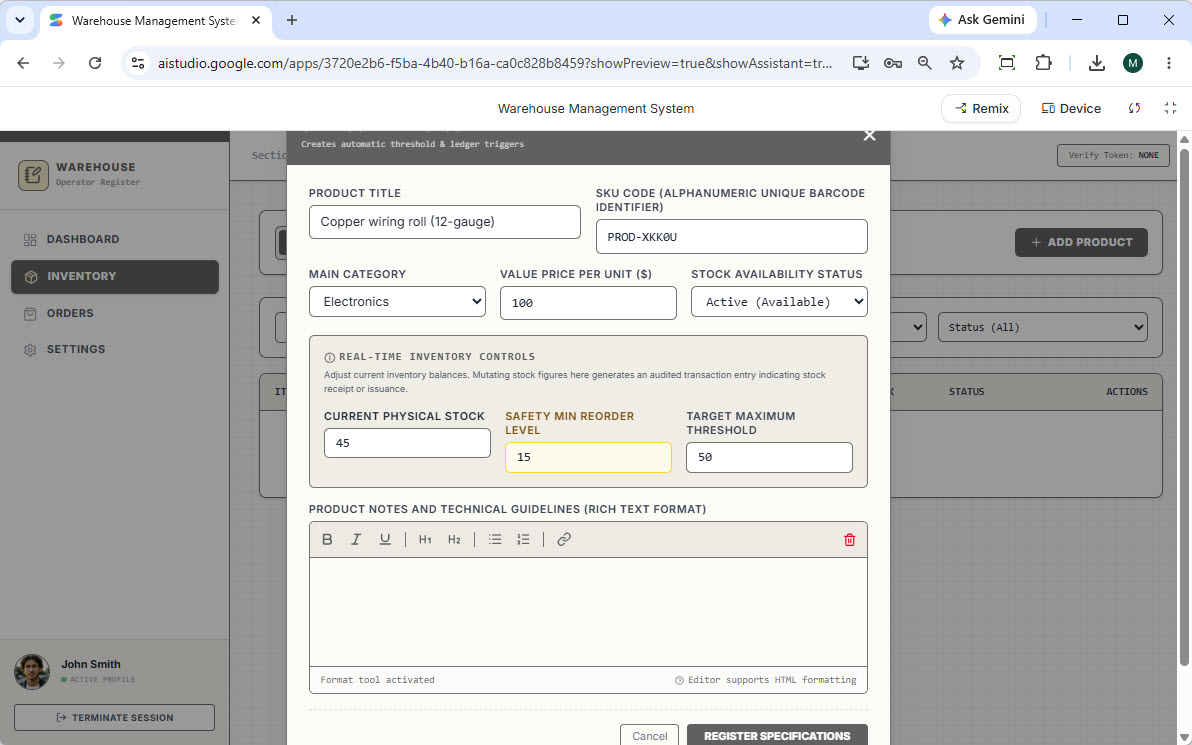
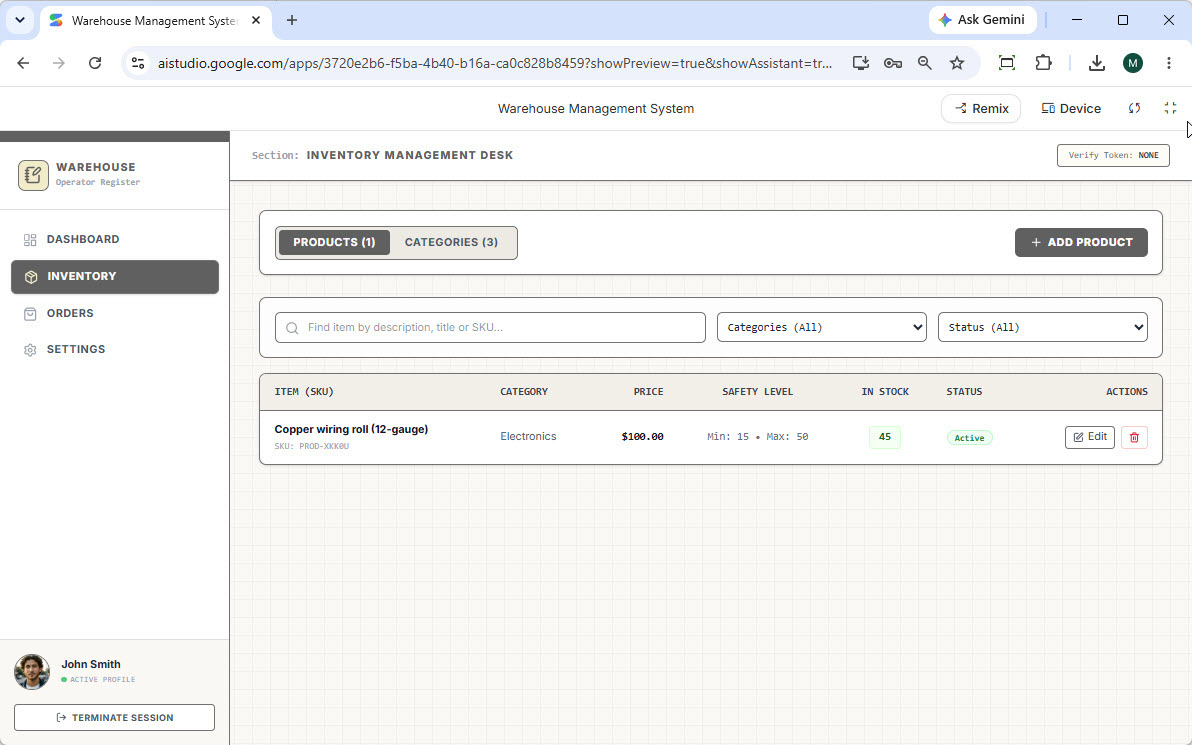
- Test CRUD Data Entry (Add Inventory Products)
Navigate to the Inventory menu option and click Add Product. Fill out your asset information fields. Notice the Main Category selection dropdown menu; this field reads the lookup table records automatically created by App Studio’s mock data engine.
- Save Your Assets
Click the Register action button. The interface instantly commits the new product entry to your remote cloud database table.
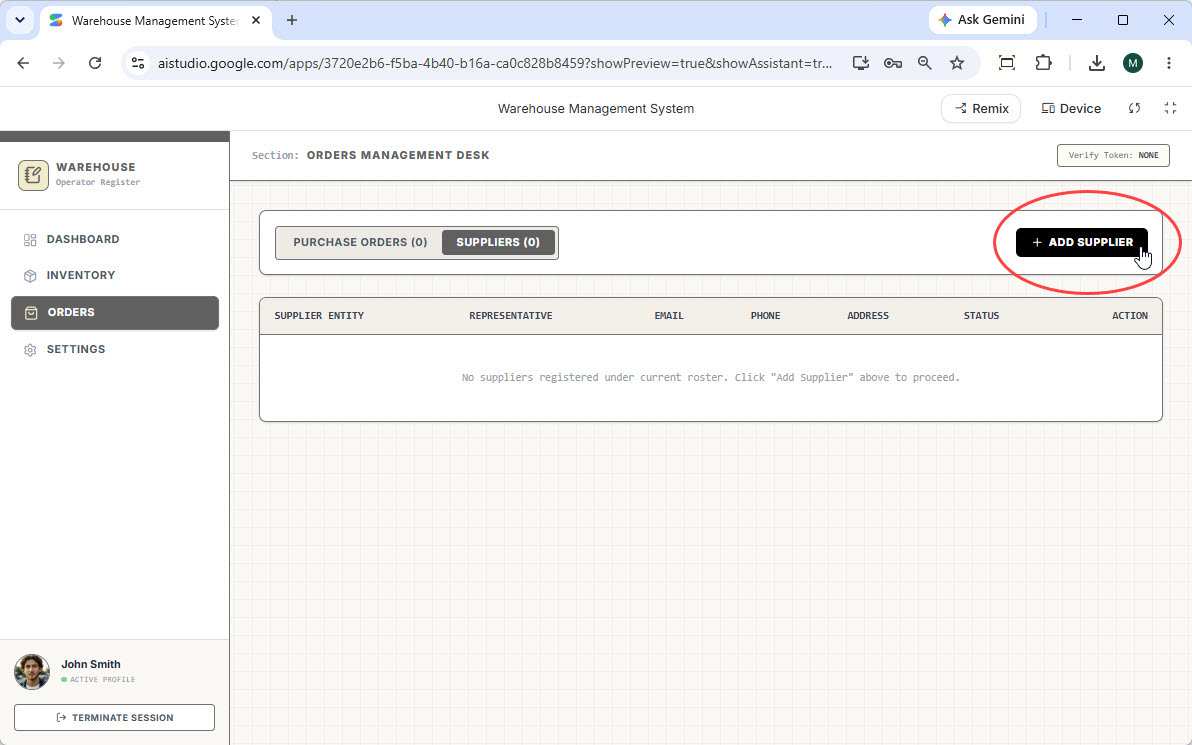
- Establish Supplier Profiles
Open the Orders tracking portal. Select the Suppliers management tab panel and click the Add Supplier button.
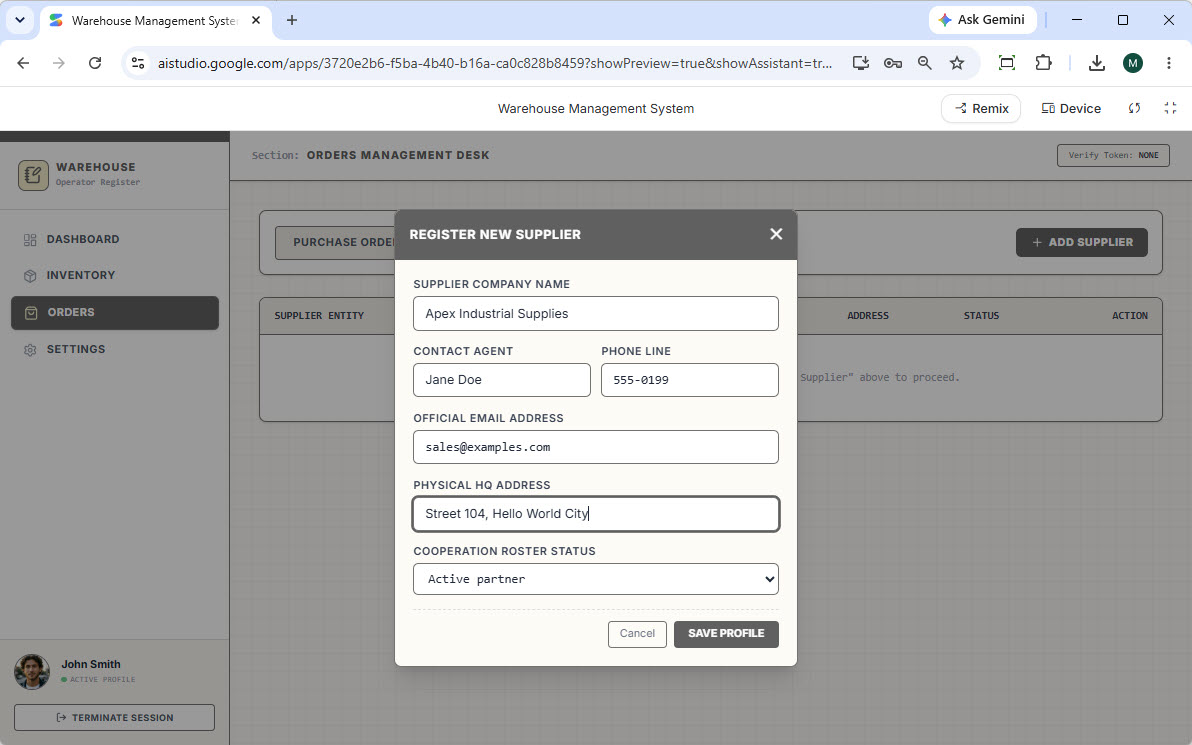
- Commit Supplier Records
Populate the vendor data fields inside the modal overlay dialog box and click Save Profile to store the supplier record.
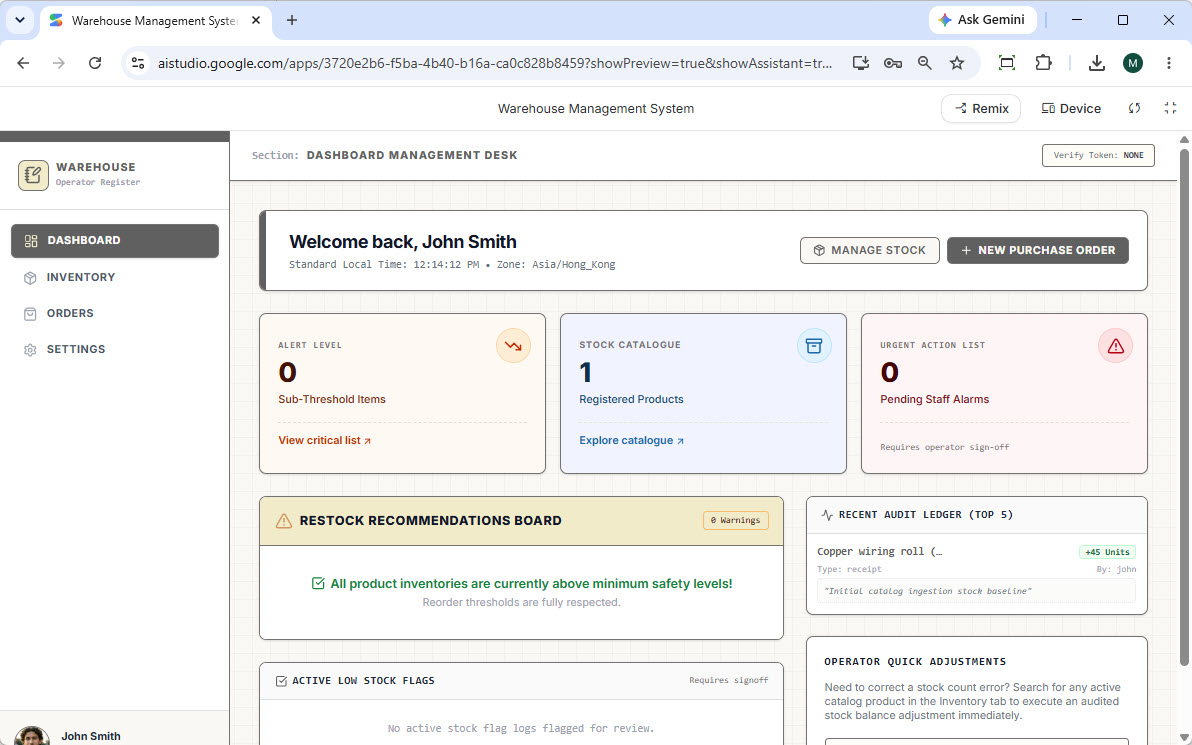
- Validate System Dashboard Metrics
Return to your primary Dashboard page. The metric counters will now reflect your newly entered records, tracking exactly “1” product alongside automated recent audit log trail entries confirming your activity.
Part 3: Live Remote Database Management
Before launching your application to end users, you will want to clean up mock test cycles, adjust validation rules, or pre-populate operational lookup variables.
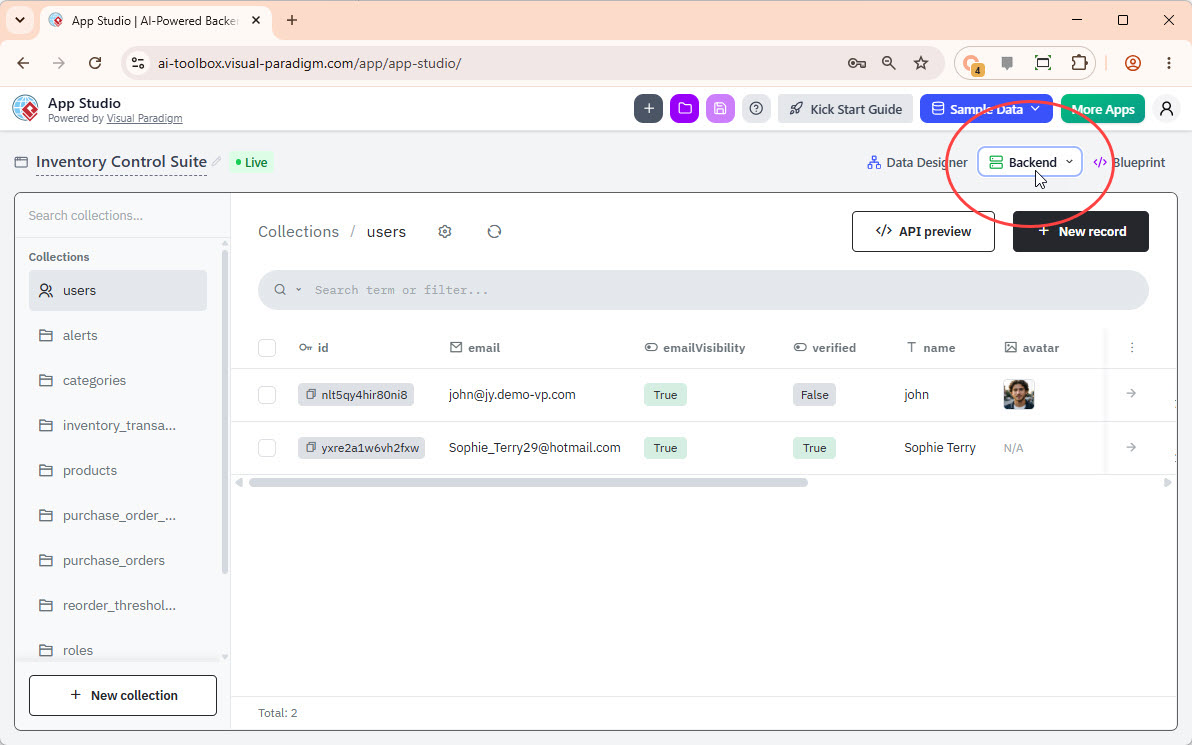
- Open the Database Administration Console
Return to your open project tab in Visual Paradigm App Studio. Locate and click the Backend button situated on the top right management toolbar.
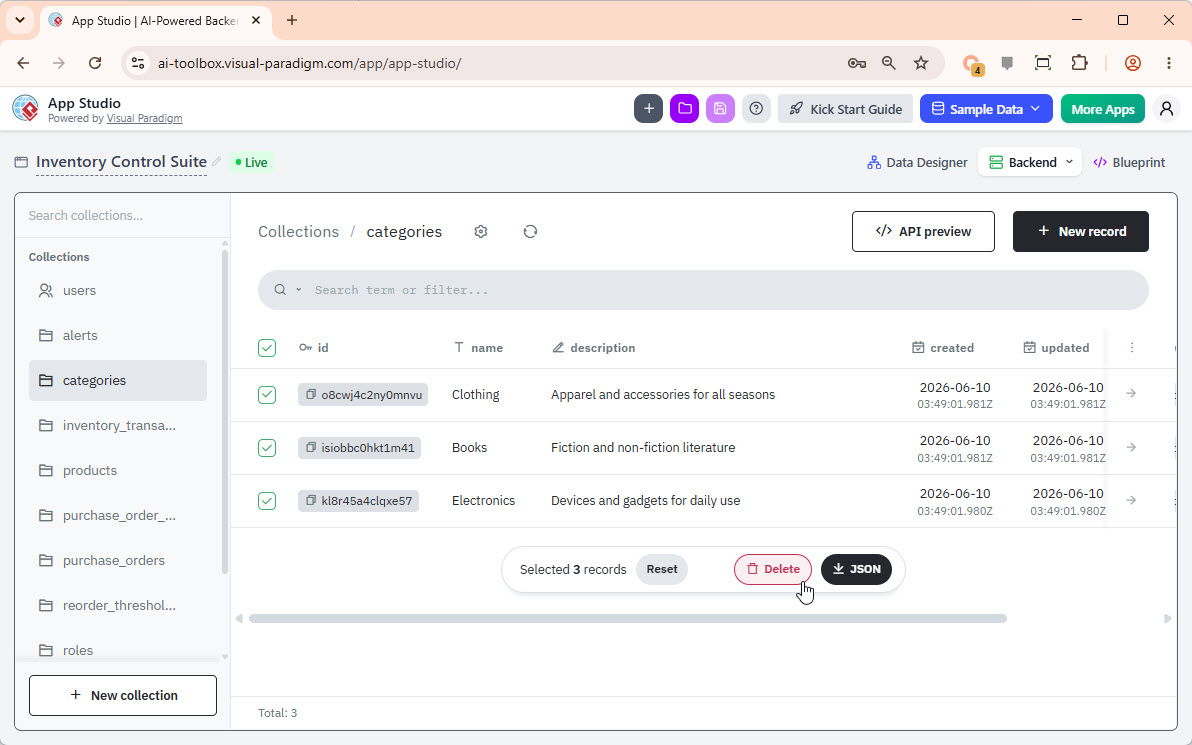
- Direct Database Access
If your user session expired, log in using the superuser credentials created during Step 7 of Part 1. You will be presented with a comprehensive relational database management console.
| Interface Region | Functional Operation |
|---|---|
| Left Sidebar Navigation Panel | Displays all relational tables generated by the AI engine (e.g., Products, Users, Suppliers, Audit Logs). |
| Right Content Grid View | Displays live table rows where administrators can instantly edit data cells, create records, or delete mock rows. |
Because your generated application connects directly to this hosted environment, any records you alter, purge, or add within this database dashboard take effect inside your live application frontend instantly.
Part 4: Production Deployment via Netlify
With a working application linked to a live database, the final stage is hosting your application files online. This guide uses Netlify to deploy the system via a simple static file upload method.
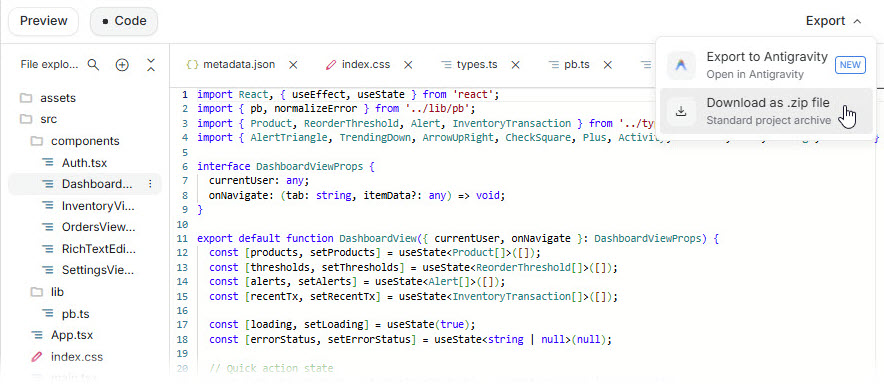
- Export Source Code From Google AI Studio
Return to your workspace panel within Google AI Studio. Locate the code viewing window containing your compiled files. - Download Your Application Package
Click the Export action button located in the top-right corner and select Download as .zip file. Save the distribution archive to your local hard drive.
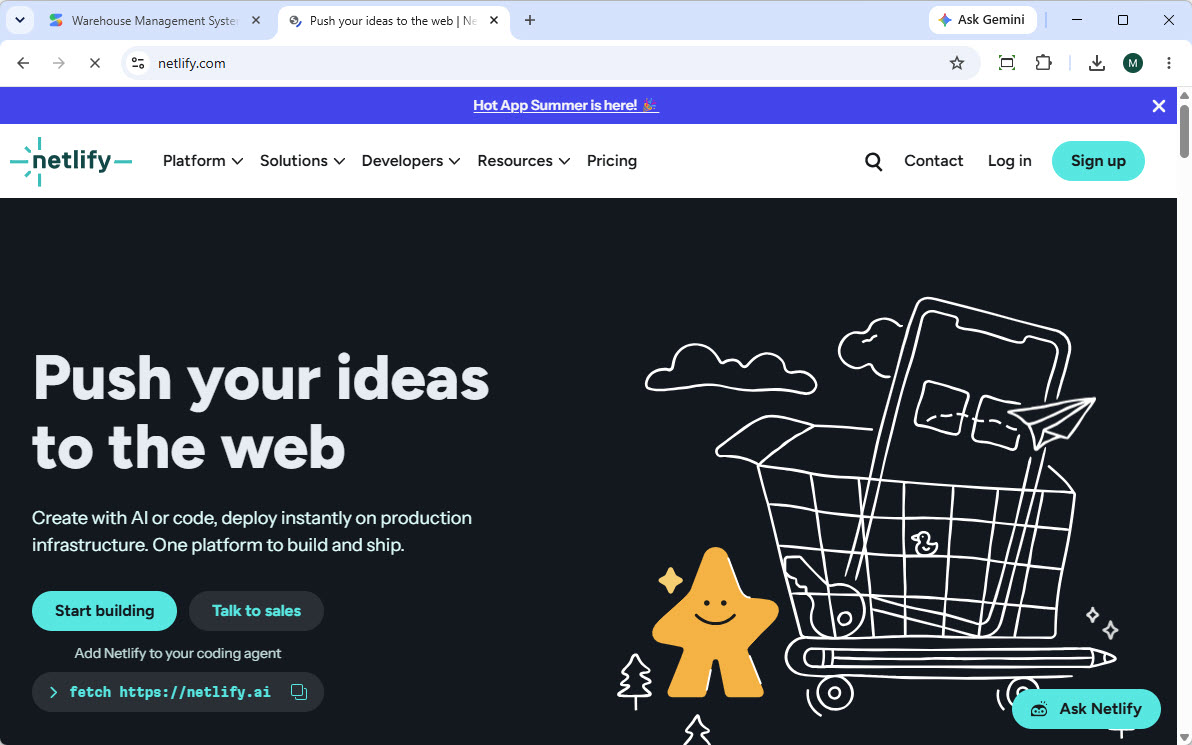
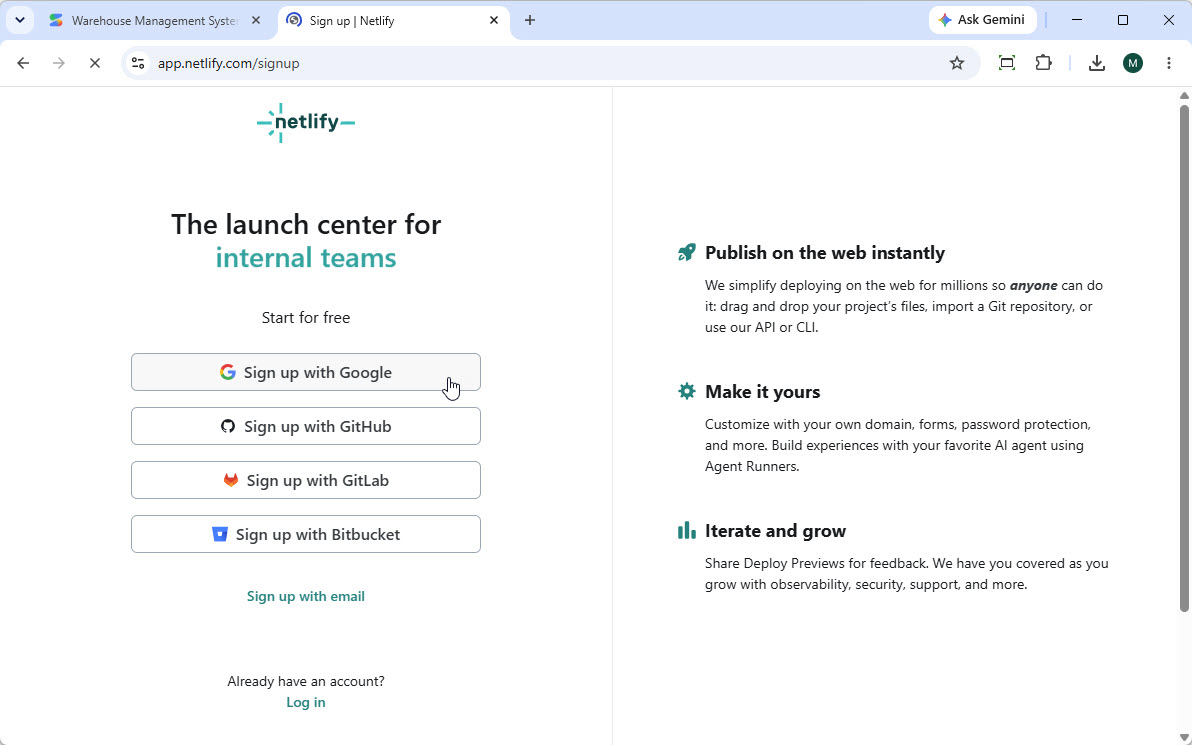
- Set Up a Netlify Account
Navigate to Netlify. Click the Sign Up action option to register an account.
- Complete Identity Authentication
Choose an authentication method to complete your profile creation. For rapid setup, select Sign up with Google.
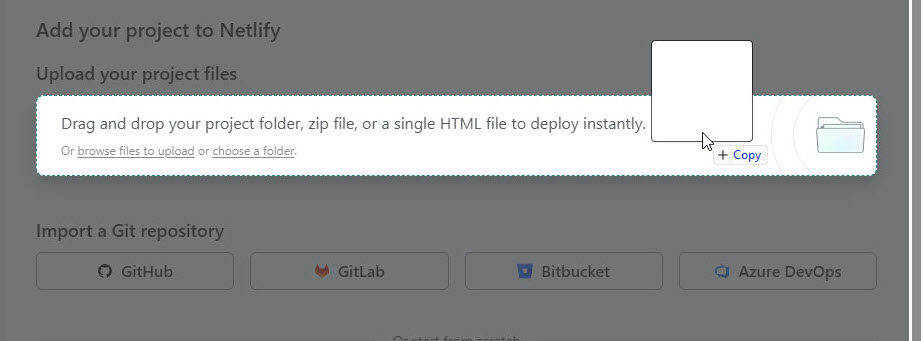
- Deploy Using Drag-and-Drop
Navigate to your primary account dashboard page. Locate the section labeled “Upload your project files”. Select the compiled .zip file from your local file browser and drag it directly into this dropzone area.
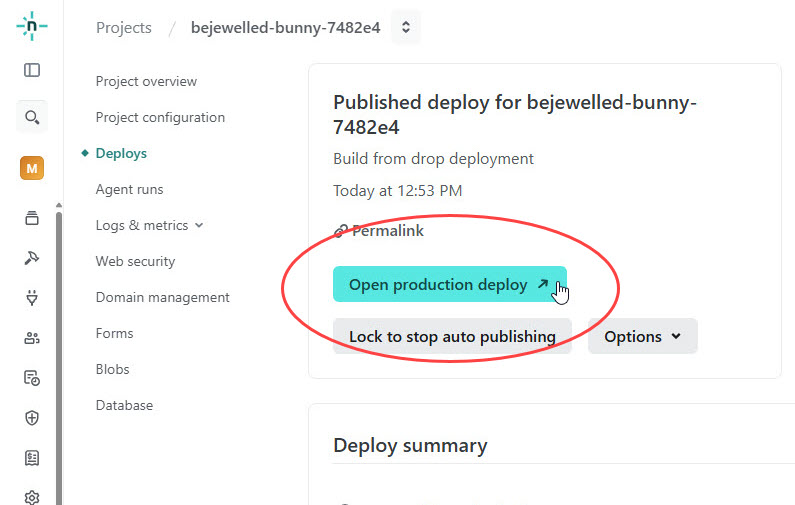
- Launch Your Production App
Netlify’s automated edge networks will instantly extract, optimize, and distribute your deployment build files worldwide. Once the deployment process completes, click the Open production deploy button at the top of the workspace.
Your web application is now live, fully connected to your backend database, and ready for your team!
Conclusion
By leveraging Visual Paradigm App Studio alongside next-generation code generation tools like Google AI Studio, the time required to build database-driven web systems drops from weeks to minutes. Rather than struggling with backend server configuration or database connectivity issues, developers can instantly deliver robust enterprise software solutions. Try building your next application today by visiting Visual Paradigm App Studio.