

Building an application with App Studio is a streamlined, four-step process. By separating the initial data modeling from the visual styling, the platform ensures your app is built on a rock-solid, production-ready foundation.
Step 1: Defining Your App’s Core (The Ingestion Phase)
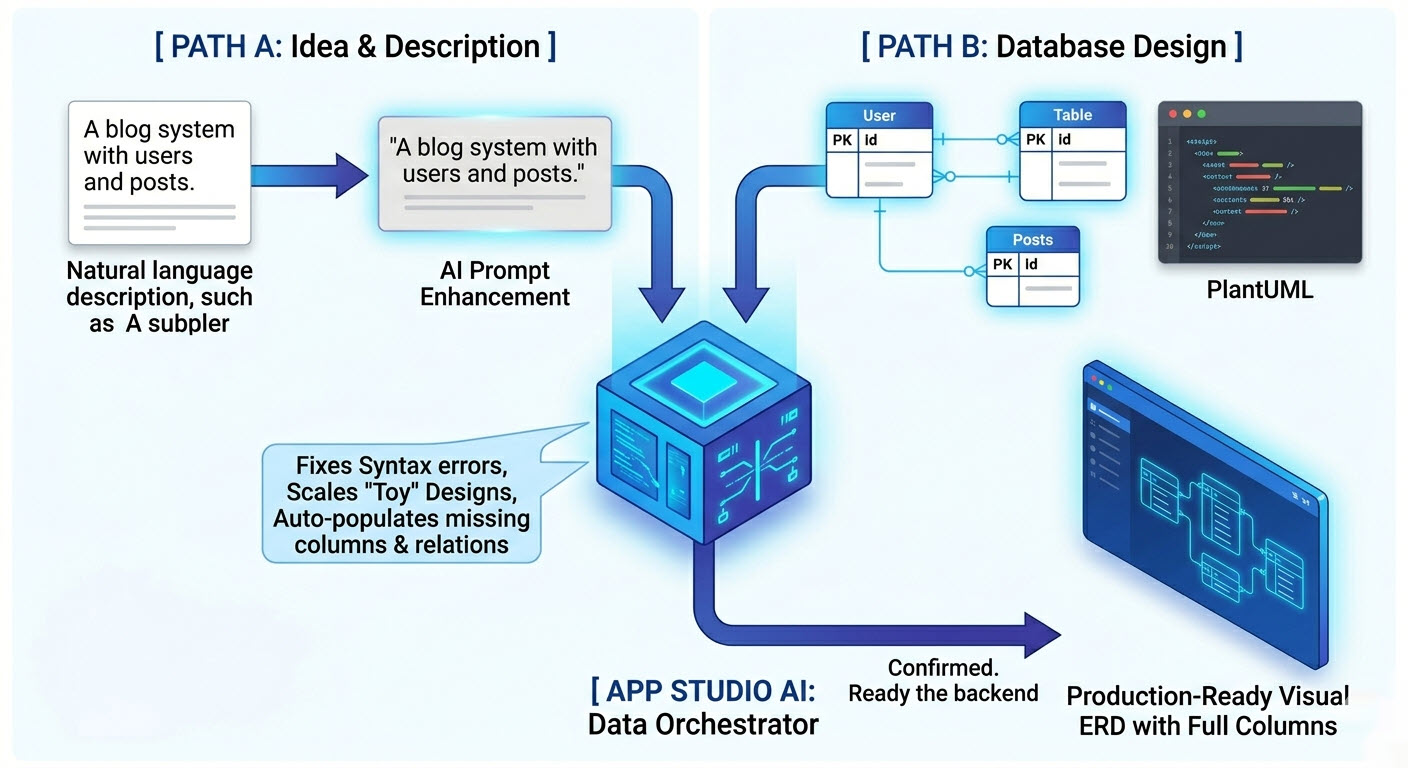
When you land on the App Studio index page, you can choose between two distinct pathways to kickstart your project depending on your technical background or starting materials:
Path A: Start with a Description of Requirement
Ideal for users who want to build an app from scratch using natural language. In the center of the page, you will find a dedicated text input box to describe what your application needs to do.
- Example Prompt: “Create a blog system with users, posts, comments, and tags. Users can write posts, comment on posts, and posts can have multiple tags. Include proper relations and required fields.”
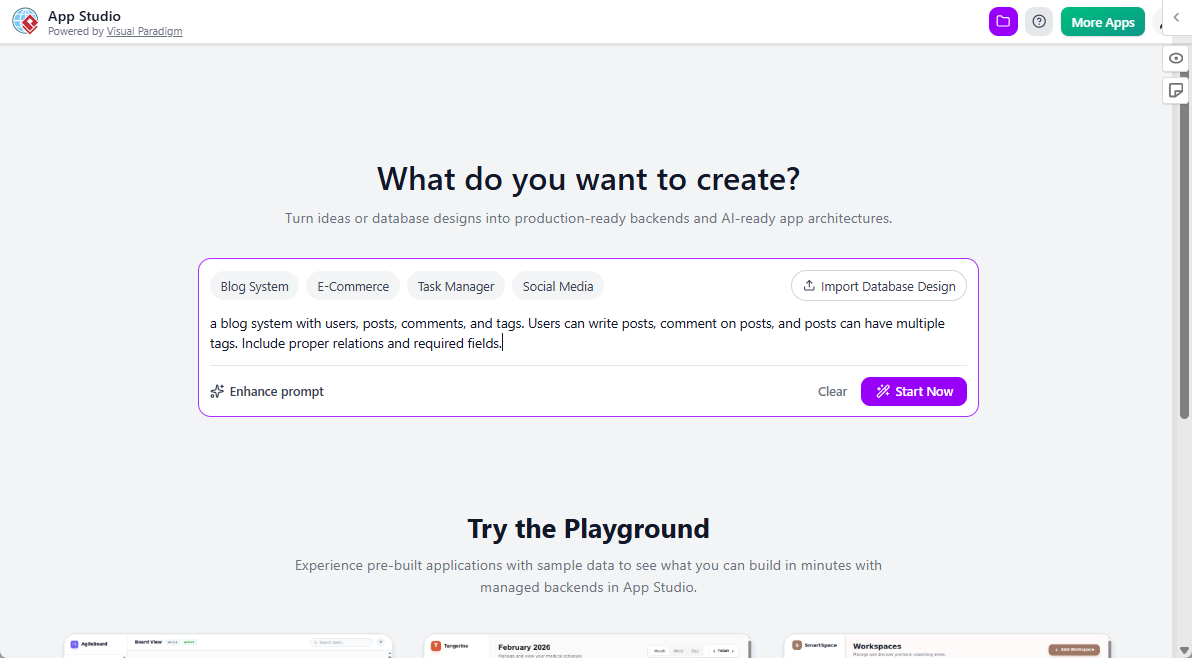
- AI Prompt Enhancement: If you are unsure how to phrase your requirements or want a more thorough structure, click “Enhance prompt”. The built-in AI will automatically enrich your description, fleshing out edge cases and implied features.
- Click “Start Now” to transition to Step 2.
Path B: Start with a Database Design
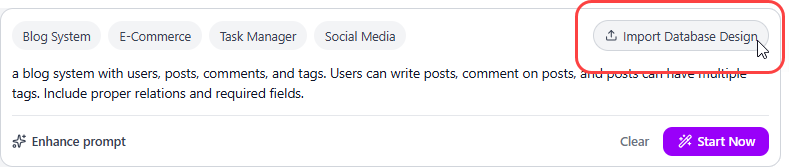
Ideal for developers or analysts who already have a structural plan. Because App Studio is fundamentally data-driven, you can bypass text descriptions and seed the system with a database model directly.
- Click on the “Import Database Design” button to open the configuration dialog.
- Paste the PlantUML code of your Entity Relationship Diagram (ERD).
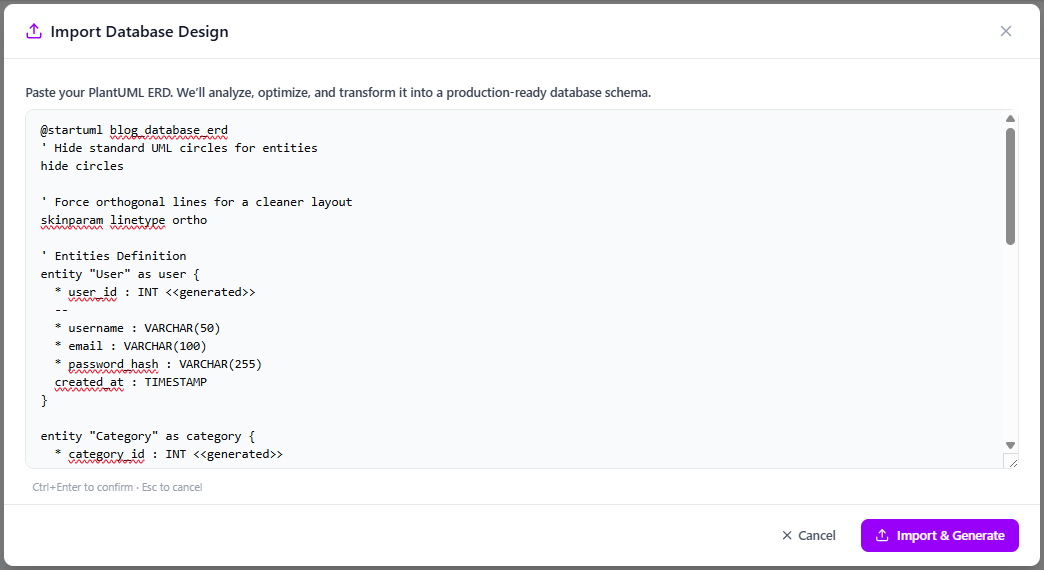
- Click “Import and Generate” to advance to Step 2.
Step 2: Visualizing and Confirming Your Architecture
Once your initial inputs are submitted, App Studio transitions to the modeling canvas to validate and refine the database schema before it ever builds an app prompt.
- If you started with a text description (Path A): The AI automatically generates an initial ERD mapping out your required database entities and their relationships. To prevent cognitive overload, this initial diagram shows the high-level system boundaries without table columns. Once the AI finishes rendering the backend structures, click “Full ERD Ready. Click to Proceed” at the bottom right to reveal the exact columns and data types.

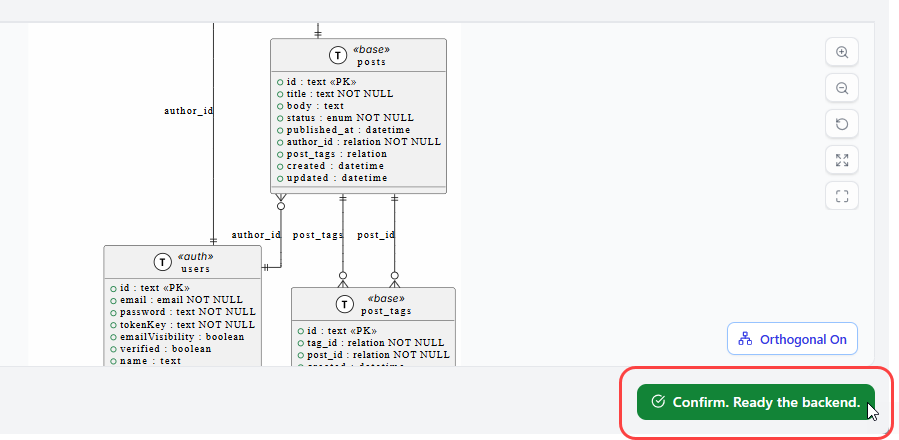
- If you started with a PlantUML import (Path B): App Studio does not blindly accept the raw design. To guarantee it is stable enough for real application logic, the AI thoroughly analyzes the code to resolve syntax errors, fix missing relationships, or scale up a basic “toy case” into a robust architecture.
Review the final visual layout. Once you are satisfied with the entities and structural logic, click “Confirm. Ready the backend” to move forward.
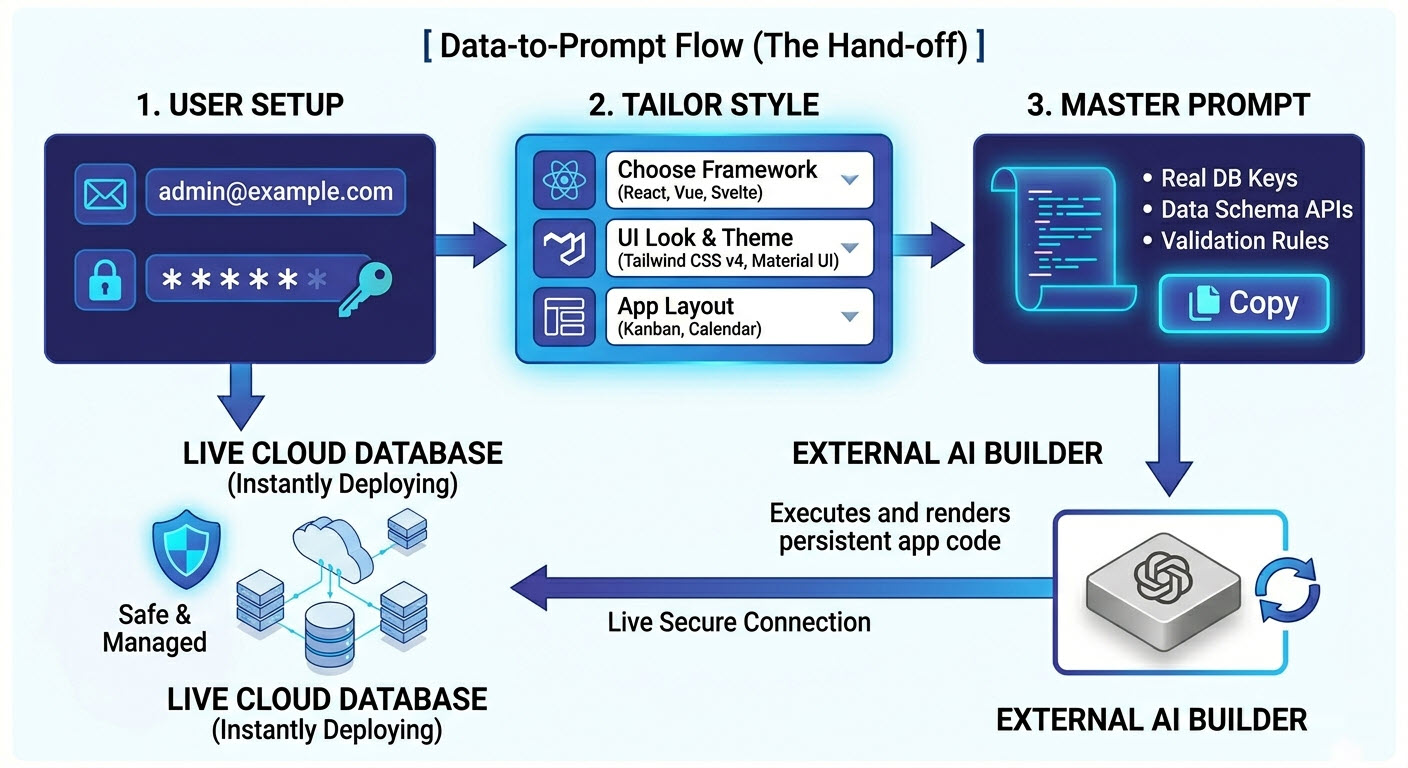
Once you have confirmed your production-ready ERD in Step 2, App Studio shifts focus from intelligent data architecting to secure backend provisioning and highly optimized blueprint generation. The following diagram illustrates how the platform automates the creation of your live, managed database and orchestrates all your custom parameters into a perfect Master AI Prompt blueprint.
Step 3: Instant Backend Provisioning
A functional application requires a persistent database layer to read and write records. To make your app immediately operational, App Studio instantly creates live, hosted infrastructure for your project.
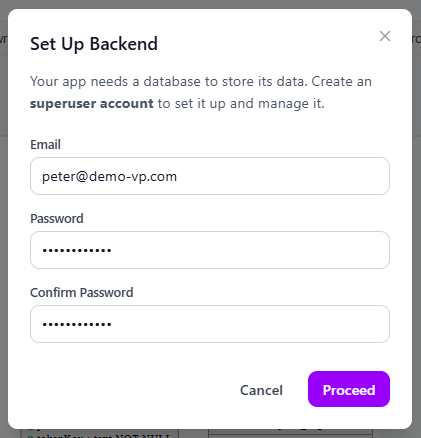
- As soon as you confirm your diagram, a dialog titled “Set Up Backend” will appear.
- Enter a secure Email and Password. This information is used to automatically provision a superuser administrative account for your application’s database.
- Click “Proceed”. Within a few seconds, your live, cloud-hosted database is initialized and deployed behind the scenes.
Step 4: Tailoring the Blueprint & Generating Your App
With your database successfully hosted, you are automatically redirected to the Blueprint control center. This dashboard allows you to define the exact visual, structural, and aesthetic identity of your frontend application, directly modifying the output of the final AI builder prompt.
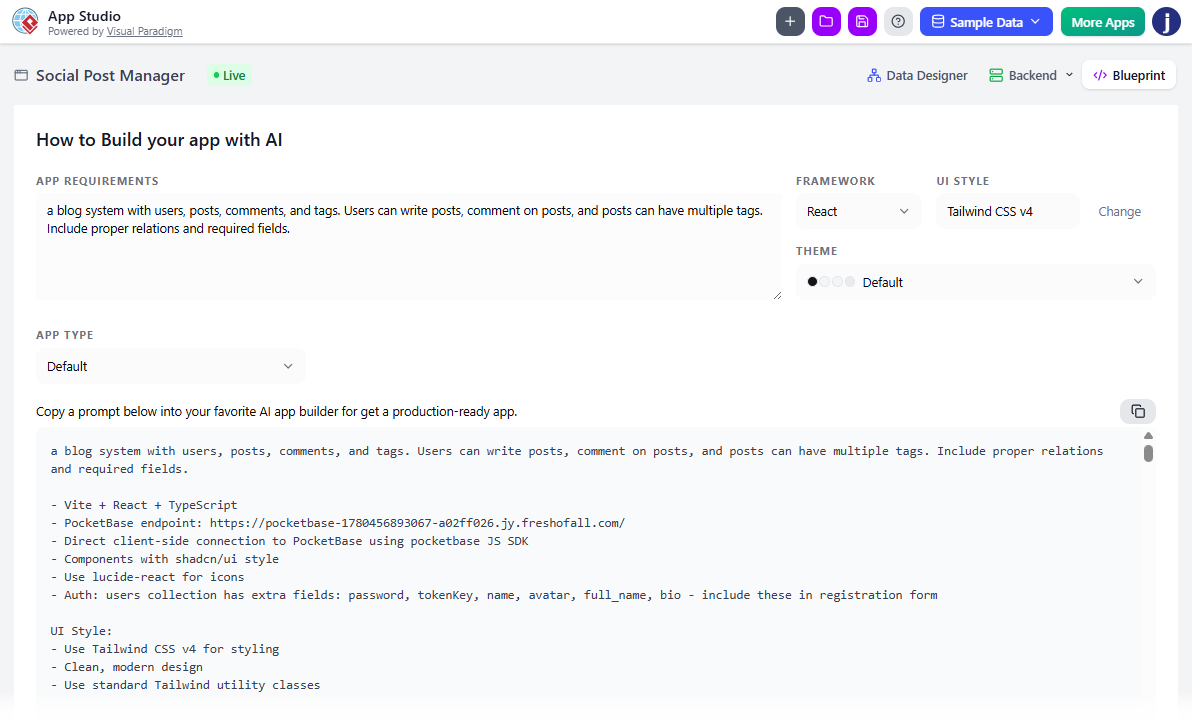
Before copying your prompt, utilize the control center configurations to fine-tune the following app attributes:
- Framework: Choose your preferred code architecture from React (Default), Simple, Svelte, Vue, or Angular.
- UI Style: Select a design philosophy, including options like Tailwind CSS v4, Neobrutalism, Glassmorphism, Bootstrap, or Material UI.
- Theme: Select from a curated set of professional color palettes to style your interface.
- App Type: Dictate the primary layout layout for your app UI, such as Default, Wizard-based, Tabs-based, Form-based, Gallery/Card, List/Table, List with Details, Calendar, or Kanban.
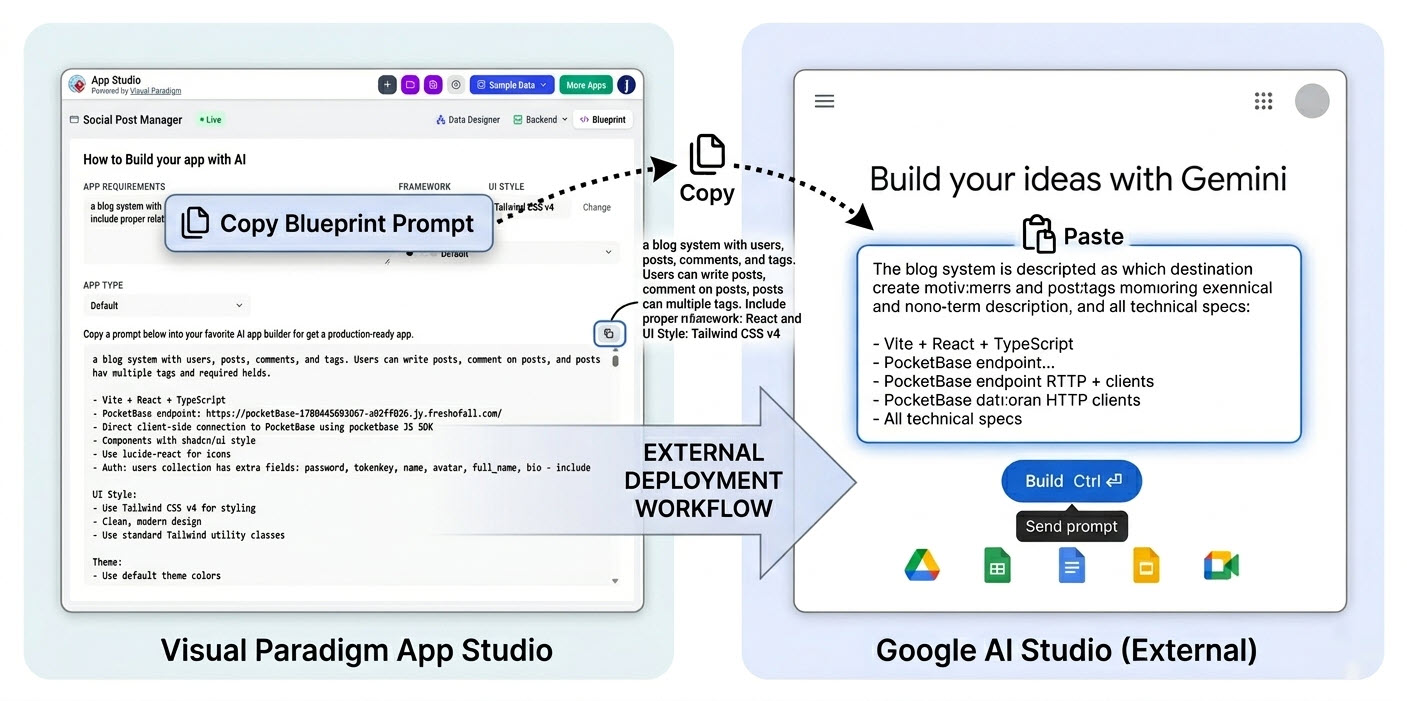
As you adjust these settings, App Studio dynamically injects your design choices, database access keys, API pathways, and data validation rules directly into a master configuration script. Click “Copy AI Prompt” to copy the complete master blueprint, paste it into your external AI environment of choice (such as AI Studio), and execute it to generate a production-ready, fully connected application.
Beyond App Studio: Completing Your App’s Journey
Once you click “Copy AI Prompt”, you have successfully completed the data modeling, backend provisioning, and design tailoring phases inside App Studio. To turn this master blueprint into a running website that you can share with the world, your final journey involves two external steps: generating the code and hosting it on the web.

1. Executing the Blueprint in an AI Environment
Because App Studio produces a universal configuration prompt, you can feed this blueprint into any major, high-context Large Language Model (LLM) provider capable of generating complex source code (such as Google AI Studio, Anthropic Claude, or OpenAI ChatGPT).
- Select an AI Developer Environment: Open your preferred external AI interface. For best results with complete multi-file codebases, choose a model optimized for programming tasks with a large context window.
- Apply System Instructions: If your chosen AI environment features a dedicated “System Instructions” or “System Prompt” field, paste the structural rules provided by App Studio there. This ensures the AI maintains a rigid developer persona throughout the generation.
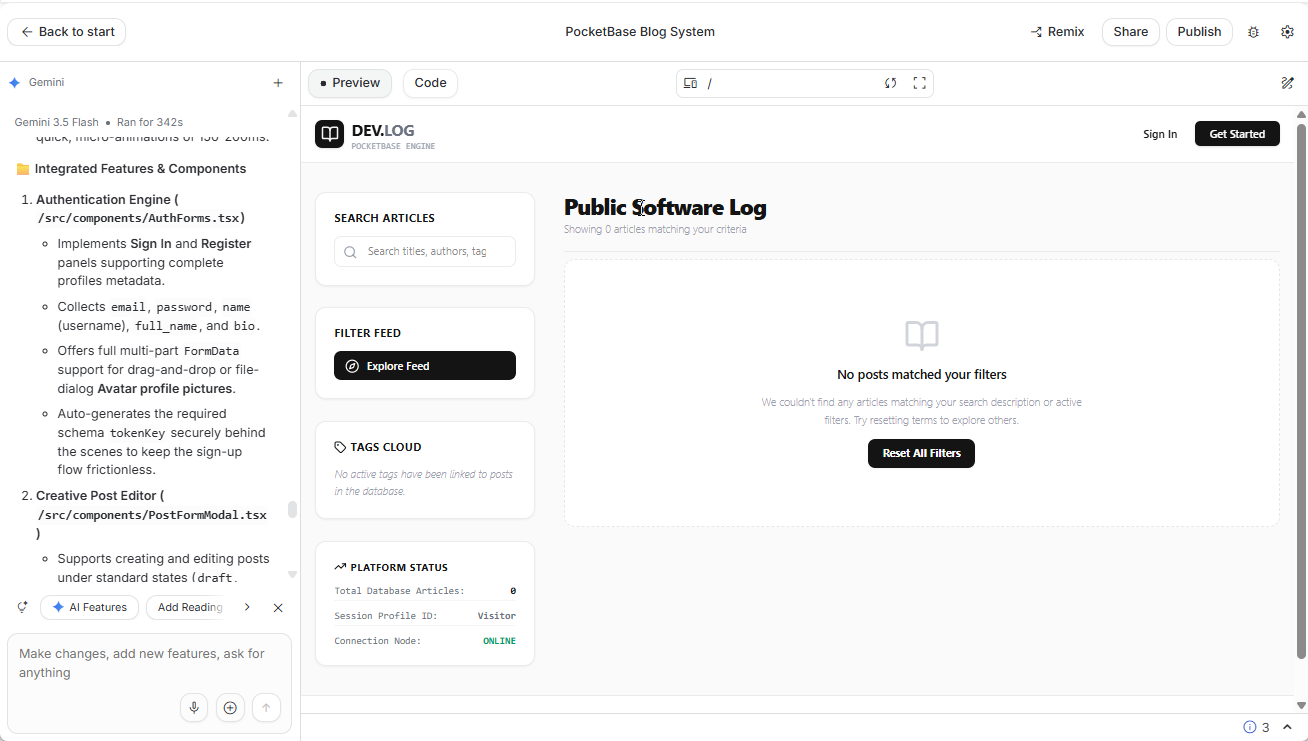
- Generate the Codebase: Paste the remaining user-tailored blueprint into the main text box and run the prompt. The AI will read the embedded database configurations and design paths, generating your complete web application frontend files (typically standard HTML, CSS, and JavaScript).
The image below shows a success execution of an app prompt produced by Visual Paradigm App Studio, in Gemini AI Studio.
2. Deploying Your Application to the Cloud
Once the AI outputs your code files, you can use any modern, static web hosting service to put your app online. Platforms offering a “Drag-and-Drop Static Deployment” model (such as Netlify, Vercel, or GitHub Pages) allow you to publish your creation instantly without managing servers or infrastructure.
- Prepare Your Directory: Create a folder on your computer and save your generated code files inside it. Ensure your main homepage file is named exactly
index.html, as static hosting providers look for this file by default to serve your site. - Upload via Drag-and-Drop: Most modern static hosts allow you to create a free account and deploy by dragging your local folder directly into a web-based upload zone.
- Access Your Live Link: Within seconds of processing your folder, the hosting provider will generate a secure, live public URL (HTTPS) where you, your team, or your clients can interact with the fully functioning application.